How to Hem a Skirt: 3 Ways and a Trick for Flared Hems
The hem of your skirt is hanging down at the back, or it's an inch or two too long. Or you found a skirt or a dress at the thrift store and want to shorten it. The good news: hemming a skirt is a relatively “friendly” fix in sewing. Once you know what method will work for your fabric and the shape of your skirt, even someone with basic sewing skills can hem a skirt.
In this blog post I'll walk you through three different ways to hem a skirt on a sewing machine:
- with a double fold hem,
- with a serged (or overcast) single fold hem, and
- with a single fold hem finished with (bias) tape.
Depending on the type of fabric, the shape of the skirt and the finishing you prefer, you will choose how you hem your skirt.
As a bonus, I'll share the trick for the part that frustrates almost everyone: most skirts get wider toward the bottom, therefore any fold you make to hem just won't lie flat. A little easing (by gathering the fabric), some steam, and a good press fix this.
Before You Start
Six preparation steps make the actual hemming methods described below easier. If you are new to sewing and need some help with setting up your machine and preparing it for sewing, or learning how to sew in general click on the hyperlinks in this sentence to go to one of my blog posts that are written to help beginners through the first steps.
To prepare for hemming a skirt, first:
1. Let full skirts hang first if it was stored flat for a long time. If the skirt is very full or cut partly on the bias, the fabric stretches downward. Hang it for a day before you mark the hem so you don't end up with a wavy hemline later.
2. Iron the skirt
3. Mark the new length. Put the skirt on with the shoes you'll wear it with and have someone pin the desired length at an even height from the floor, or fold it up and check in a mirror. A skirt marker that sprays chalk at a set height is handy if you own one, but pins and a ruler work as well. If you're changing the length of an already-hemmed skirt, unpick the old stitching first.
4. Unpick the old hem with a seam ripper if you are not cutting it away entirely.
5. Decide on your hem allowance. For a straight skirt, 1" to 2" is a common hem width. The more the skirt flares, the narrower the allowance should be, down to about ½" on strongly curved hems. Less fabric to fold means less fullness to deal with
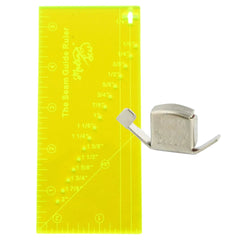
6. Mark and trim. Measure the allowance all around with a seam gauge or other small ruler, mark the cutting line with a temporary fabric marker (like this yellow chalk marker) and trim the fabric evenly.
If the hem has simply come loose, press it back and try to use the same method it was made with. If you want to use one of the methods below, unpick the original hem and follow along. If your skirt was hemmed using a blind stitch, you can either sew it back in place by hand or use the method explained in my blind hem tutorial with a sewing machine. I want to warn you that sewing a blind hem with a sewing machine is not very beginner-friendly.
Method 1: The Double Fold Hem
The double fold hem is the classic hem. The raw edge is folded away twice, so it's fully enclosed and can't fray, and the stitching sits neatly on the inside. It works best on light to medium weight fabrics like cotton, rayon and light crepe, and it's the common choice for most skirts.
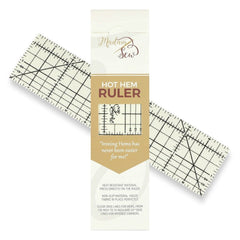
1. Fold up the first turn. Fold the raw edge up ¼" to ½" toward the wrong side and press. The Hot Hem Ruler makes this quick: line the fabric edge up with the measurement on the ruler and press right over it, with steam or dry. This ruler is heat-resistant, so the iron can sit directly on it. No need to mark before you press.
2. Fold up the second turn. Fold up again by the full hem depth you want, for example 1", and press. Clip the fold in place all around; sewing clips hold it without leaving pin holes.
3. Stitch. Sew close to the inner folded edge, about ⅛" away, with a slightly longer stitch (2.5 to 3 mm). Backstitch when you start and at the end to lock the thread, and overlap the starting stitches by about ½". Clip the thread ends.
4. Press again. Give the finished hem a last press so the stitches settle into the fabric.
For lightweight, sheer or fluid skirts (like silk or chiffon), you can also use a narrow rolled hem. A bulky hem can distort the drape of the skirt. You can read about this method in the blog about two types of rolled hems or the one about the rolled hem foot.
Method 2: Serge the Edge, then Fold Once
On heavier fabrics like denim, wool, corduroy or thick ponte, a double fold gets bulky and can leave a ridge you can see from the outside. Finishing the raw edge first and folding just once keeps the hem flat.
1. Finish the raw edge. Serge it if you have a serger. If you don't, use a zigzag stitch or an overcast stitch + overcast foot to stitch on the edge of the fabric, all around. This will make sure the edge doesn’t fray. There's an overcast foot in the Madam Sew Ultimate Presser Foot Set and learning how to use it is explained in the blog post “use your home sewing machine as a serger”. You can also finish the edges with pinking shears. Cutting the edge with a zigzag pattern is a very fast solution and works on fabrics that don't fray much. Serging or adding a stitching are the preferred options. In general, the edge stays more exposed on the inside on skirts compared to pants, so you want the finishing to be neat.
2. Fold up once. Fold the finished edge up to your hem depth (1 to 2 inches) and press. You can use the Hot Hem Ruler for an even press and fold in one step. For curved edges, you can use the short side of the hot hem ruler. You will have to reposition it more often, but it is still faster than marking and pinning. When the whole hem is pressed, add a few clip or pins to hold the hem in place at the machine.
3. Stitch. Sew about ¼" from the finished edge, inside the hem allowance. Backstitch at both ends and give a final press.
The trade-off: you'll see the raw, finished edge if you lift the hem, so this suits skirts where the inside isn't on show or where you can blend the edge nicely with the fabric. If not, use Method 1 or add some bias tape to the raw edge (Method 3). This is also helpful if you want to add some length to the skirt instead of shortening it. You would just need ¼ inch hem allowance for this technique because you are adding the tape.
Method 3: Single Fold with (Bias) Tape
With this method, a strip of bias tape or hem facing tape is sewn to the raw edge and folded to the inside. There's no folded bulk at the hem, and because bias tape is cut diagonally, it can stretch to follow curves. It also costs you only about ¼" of length (seam allowance), which is perfect when you want to add some length or can't afford to lose any.
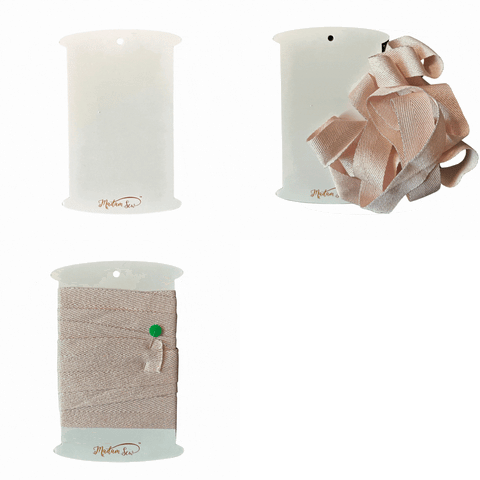
1. Get your tape ready. Use a wide double-fold bias tape or hem facing tape, or make your own from matching fabric with the Deluxe Bias Tape Maker Set. Homemade bias tape in a light fabric is softer than most store-bought tape.
2. Trim the skirt. Cut the skirt at your marked hemline plus ¼" for the seam allowance.
3. Attach the tape. Unfold the tape and place it right sides together along the raw edge, with the tape's edge even with the raw edge. Stitch along the fold line of the tape. Join the ends by overlapping them or sewing a small diagonal seam.
4. Fold to the inside. Press the tape away from the skirt, then fold it to the wrong side along the stitching line and press again, so the raw edges don’t show on the right side.
5. Stitch it down. Sew close to the free edge of the tape, catching it to the skirt. Press.
On a flared or curved hem, ease the tape gently as you fold it so it lies flat.
On a flared or curved hem, ease the tape gently as you fold it so it lies flat.
How to Hem a Circle Skirt (and other Flared Hems)
A circle skirt, a round skirt, or any A-line that gets wider toward the bottom is harder to hem than a skirt with a straight seam, and now that I think of it, there aren’t that many that are 100% straight. The reason for this is simple: the raw edge is a little longer than the line it folds onto. So when you fold it up, the extra fabric has nowhere to go, so it ripples and puckers. When the difference is small, pressing can help to ease the fabric, but very often even pressing won't flatten it.
The trick is to ease that extra fullness in before you stitch. It takes just one extra step, a few extra minutes, and makes the difference between a hem that puckers and one that lies flat.
1. Hang, mark and trim. These are the same steps as a single fold and a double fold hem: Let the skirt hang for a day, remove the old hem, mark an even hemline, trim the allowance to about ½" to 1" (choosing a narrower allowance means less fullness to deal with afterwards) and finish the raw edge.
2. Sew an ease or gathering stitch. Set your machine to a long straight stitch (about 4-5 mm), sew close to the raw edge (⅛ to ¼”) all around. Leave long thread tails at both ends and don't backstitch.
3. Ease in the fullness. Gently pull the bobbin thread to gather the edge until it fits the fold line. Spread the fullness evenly instead of bunching it in one spot.
4. Fold up the edge. Fold the hem up along your hemline and test if the gathering is enough or too much. Adjust if needed. Press the crease for the hem. When you want a double folded hem, turn the raw edge under ¼” now (method 2).
5. Use some pins or clips to hold the fold(s) in place when the gathering is done. Position them at the seams and the halfway points between them.
6. Press the hem flat. Press with steam from the fold toward the raw edge, so the little gathers shrink into the fabric. Don't press creases into them. Let the hem cool under a clapper on a wool pressing mat to set it.
7. Finish and stitch. Stitch the hem in place close to the raw edge or the fold closest to the raw edge.
Tools that help here: a Clapper holds the heat and steam in the fabric while it cools, and a Wool Pressing Mat holds heat, lets you press from both sides, and prevents shine on the fabric.
Want more on easing and pressing? The ease-stitching tip is covered in our Hemming Tools Guide that is published on the Madam Sew Sewing and Quilting Blog.
Hemming Other Types of Skirts
Some skirts have their own requirements.
Skirts with Pleats
Many people shorten a pleated skirt at the waist, so they don’t have to touch the hem or the pleats at all. If you do hem it, never sew the pleat folds into the hem. This will create too much bulk. Hem first, then press the pleats back into place. If the pressing is too tedious, you can hand it over to your local dry cleaners to iron the pleats into place.
Skirts with a Slit
Finish the edges or the hem of the slit before you hem across the bottom. The final fold is that of your hem. Make sure you fold the corners neatly where the two meet. Before you unpick the hem, take a picture so you can apply the same finishing. If you are using mitered corners, you can use the 45° guides on the Hot Hem Ruler to help you press them accurately.
Your Next Steps
Pick the method that fits your fabric, press before you stitch, and ease in the fullness on any flared hem. That's really all it takes for a hem that lies flat. The Hot Hem Ruler speeds up the pressing for straight hems, and a clapper and wool pressing mat do the same thing for flared ones.
Want to start from scratch and sew a new skirt? Try our gathered summer skirt tutorial (no pattern needed) or learn how to make a skirt from a store-bought pattern with the pencil skirt tutorial.
And if pants or jeans are on your pile of clothing alterations, check the blogs How to Hem Pants with a Sewing Machine and How to hem a jeans with an invisible hem.
Happy Sewing!
An Blogging for Madam Sew