Learn How to Sew a Hole in Jeans with Invisible Mending: A Step-by-Step Guide
I’ve thrown away a lot of very nice jeans in the past due to crotch tears. As we use our bikes a lot to get around in our little town, that’s where they get worn out first. Now that we are stuck in the house (COVID pandemic), and I don’t like buying jeans online (you want to try it on, right?), I decided to give mending with my sewing machine a try. In this tutorial, I’ll show you step-by-step how to sew a hole in jeans and use invisible mending as a sewing technique. You’ll get some background information on the way jeans fabric is made, so you understand how to reconstruct the fabric.
If mending jeans works nicely, I’ll save some money and help the environment a little :-).
Step one: Watch and learn. I turned to Google and YouTube for help.
There are a plethora of different techniques to mend your favorite pair of jeans. The method depends highly on the hole or tear that you are repairing. Children tend to get holes in the knees of their jeans– to mend this kind of tear, you can add a patch which will also help to reinforce it. For adult jeans, you can try Sashiko mending by hand, which is really nice. But, I want to try invisible mending. There are some people that can really do magic with mending– they really have a talent for it! I found a company named Indigoproof that offers jeans mending as a service. The owner is truly a pro, really. Check out her website (all links at the bottom of this article).
But, back to my home confinement. This is my first attempt at machine-mending my own jeans, so my expectations are not that high. I hope this pair of jeans is wearable after my repair attempt. Luckily, the crotch isn’t visible, so that reassures me a bit.
I will explain the technique that I used, and share some tips and tricks.
First, analyze the tear
To sew a hole in jeans, hold the jeans to the light and identify which part needs to be reinforced. Don’t limit mending to the tear itself. If the part around the tear is also very thin, you need to take that part into consideration, too. If not, you will quickly have a new tear.
Measure the area that needs to be mended. A ruler or measuring tool helps you get an accurate sense of how big the backing piece needs to be.
Clean up the wound
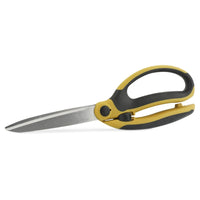
Clip off the frayed edges around the hole, so you have clean edges. Clip off the frayed edges around the hole using scissors or a seam ripper, so you have clean edges.
Choose the threads wisely.
I’m using an all-purpose polyester thread to sew a hole in jeans because it’s strong. You can also use embroidery thread. It’s finer, and it has a softer feel against your skin. Check out the embroidery thread set we have in our store.
The color of the threads you are using to sew a hole in jeans is also very important. If you want the mended area to be truly invisible, you need colors that blend in nicely. This is the hard part in Corona times. I can’t run to the store with my jeans and find the best match, so I’ll have to do it with the available thread.
Generally speaking, using warmer versions of your jeans’ color is the best option as they will be more difficult for the eye to see.
What Needle to use
If you are not sewing into seams, you can use a regular needle– but if there is a bulky seam involved, you better switch to a sturdy jeans needle to avoid needle breakage.
Use Backing
For the backing, I’m using what I have at home for now. If you can, buy backing. I would suggest a quality cotton fusible interfacing. If the hole is really big, you can add a piece of jean material as backing and glue the sides onto your trousers with temporary fabric glue, double-sided seam tape, or basting spray.
Cut the backing a little bigger than the area you are going to repair.
Iron it onto the inside of your jeans using a high-heat iron and no steam. Don’t pinch the tear together. You will see the interfacing on the outside if the hole is big. That’s ok. Press for at least 20 seconds.
A Darning Foot Helps to Sew Hole in Jeans
To darn with a sewing machine, a darning foot can come in handy. They are called darning feet, but people tend to use them more for free motion quilting than darning, I think. If you don’t have one, you can check out what we have in our store, the darning foot or presser foot set. This set comes with two different darning feet.
With a darning foot, you can sew in any direction you want– backward, forward, sideways, diagonal, small, or big stitches, and you can easily see what you are doing. The freedom is great, but it’s not easy peasy. So, if you are a newbie, first practice on a scrap before attacking your favorite jeans.
To use a darning foot, you need to lower your feed dogs because they are moving your fabric forward, and you want to go in different directions. Some machines have a cover plate for the feed dogs. Apply that if you have it. Choose a straight stitch. The stitch length is of no importance. The feed dogs are responsible for this.
You have to move the fabrics manually, so you’ll need a good grip. Practice going forward, backward, and sideways, and try to draw a little something with your needle and thread.
With mending, you need to sew in the same direction to keep it nice and clean. Back- and forward or from left to right. Check what works best for you. You don’t want a mess of stitches, but that will happen if you change direction too frequently.
Reconstruct the Jeans’ Fabric
Basically, you are working in two layers to reconstruct the warp and the weft thread. The what? Yes, we are reweaving the fabric. All woven fabrics have a weft and a warp.
WART, WEFT AND TWILL
The WARP thread of jeans is dyed in blue/indigo or black, these are lengthwise/ longitudinal/ vertical threads that run parallel to the selvedge. They are subjected to the most tension and are placed on the outside.
The WEFT thread is often left white and is transverse/horizontally/crosswise placed, drawn through and inserted over, and under the warp threads, best seen on the inside. These are the filling yarns.
A simple way to remember and distinguish the two is to use the “A” in warp and the “E” in weft. The letter “A” has its two vertical strokes, which go in the up/down direction like a warp yarn. The letter “E” has three horizontal strokes, which goes in the left/right direction like a weft yarn.
Jeans fabric (denim) is a TWILL weave. The weave repeats on two or more warp & weft yarns. Diagonal lines are produced on the face of the fabric
WARP
Start by following the warp thread. Stitch up and down and position the rows right next to each other. Don’t sew diagonally at this stage. Keep sewing in the same direction– up and down or from left to right if that works better for you, but still follow the lengthwise grain. You are replacing the broken threads. As I said, don’t pinch the fabric together. Extend well above and below your hole. For me, the hardest part is to get a good grip. Darning on a scrap is not the same as maneuvering the jeans under your machine, and keeping the fabric nice and flat so that you don’t get unwanted pleats or pinched fabric.
And remember that it’s really annoying to un-pick this work, so stop and check how your work is looking at regular intervals, so you don’t have any regrets afterward.
TWILL
When the tear is covered, you can start the second layer. Now, you are sewing diagonally to copy the twill weave. The weft is horizontally woven, but if you look at your fabric you’ll see a diagonal line. Follow that line. You can choose a different shade of thread to break the color of the first layer and get closer to your jeans’ color. Make the second layer lighter than the first one.
With the black jeans, I sewed two layers; with the blue jeans, I just did one layer and stopped. It looked good and seemed firm enough.
And that’s it!
My first attempt to darn trousers – the black-grey jeans – was not so great. I pinched the fabric a little, the stitches were too big, and I made the first layer way too heavy. But this jeans is wearable, right? You hardly ever have a viewpoint like this in real life.
My second attempt – my neighbor's blue jeans – was way better. I used smaller stitches, which were more even, and not too thick.
There is a third project waiting– the favorite shorts of a dear little friend. quite the challenge :-)) Something to tackle next week. Check out my Instagram stories if you want to see how it turned out (@An_Madamsew).
I hope this step-by-step tutorial on how to sew a hole in jeans helps to extend the life of your favorite denim and saves you some money. You don’t need many tools or supplies to get started. Just try on some scraps first and start repairing your clothes. Your wallet and the environment will be grateful 🙂
Thanks for stopping by!
An
Sewing enthusiast @MadamSew.com
LINKS:
Madam Sew is an online sewing and quilting store. It carries Tools, Notions, Presser Feet, Essentials, Handy Helpers, Organization/Storage Items, and more for sewers and quilters. Plus, it has many manuals and free tutorial blogs to help increase your skills.
Visit us at www.madamsew.com and discover all we have to offer you.
Join our Facebook communities too!


DARNING FOOT Free Motion Foot Embroidery Foot Quilt Foot
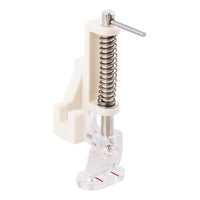
Darning Foot - Free Motion Foot - Embroidery Foot - Quilt Foot

EXTRA LARGE JUMBO QUILTING CLAMPS 6 pack
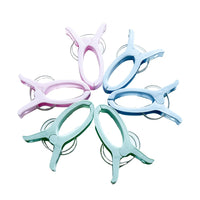
Extra Large Jumbo Quilting Clamps - 6 pack

SPRING LOADED FABRIC SCISSORS FOR SEWING