How to Make a Changing Poncho From Old Beach Towels?
Summer is in full swing so this free sewing pattern for a Surf Towel or Hooded Beach Poncho or however you would like to call it, might come too late for you at this point. Just save this tutorial for next year, the PDF download link is at the end of the article. However, this very practical beachwear is super quick to make. So if you are leaving on a surfing holiday next week, you can still have this ready to put on after a dip in the sea or use it to change into your bathing suit.
This beach poncho is made from two big beach towels that didn't get a lot of use anymore because everyone chose the lightweight hammam towels for swimming. So, if you have some unused towels in your closet, it is time to repurpose them. Win win, less waste and less money spent.
This poncho has a hood, two arm openings and two little slits at the side. If you want you can also add a big pocket on the front panel.
Another great beach project is the beach cover up I made last summer in this tutorial.
First, you need to decide what size you need. Are you making this poncho for an adult, a teen, a kid, a toddler? It is up to you and it is very easy to adapt the sizes.
Measurements
For the body
Measure:
- how long you want the poncho to be. From shoulder to knee for example.
- how wide you want the poncho to be: from shoulder to shoulder + some length for the arms
For the hood:
Copy the hood of a hooded sweater or sweatshirt that fits you well.
Some examples of possible sizes:
For an adult:
- Width: between 33 and 47 inches (85 and 120 cm), my beach towels are 41 inches (105 cm) wide, so I went with that width.
- Length: between 37 and inches 47 (95 and 120 cm), I wanted mine to be below my knees so I made it 45 inches (115 cm) long.
For an older child (8 years old):
- Width: 25 ½ inches (65 cm)
- length: 29 ½ inches (75 cm)
For a younger child (4 years old):
- width 22 inches (56 cm)
- length 23 ½ inches (60 cm)
2. Gather all the things you need for this project:
- fabrics: towel fabric or old towels (see above)
- tools: sewing machine, matching threads, scissors, sewing clips, measuring tape, fabric marker
3. Cut the different pattern pieces.
- the front panel
- the back panel
- the 2 pieces for the hood


 SOLD OUT
Bundle & Save
SOLD OUT
Bundle & Save

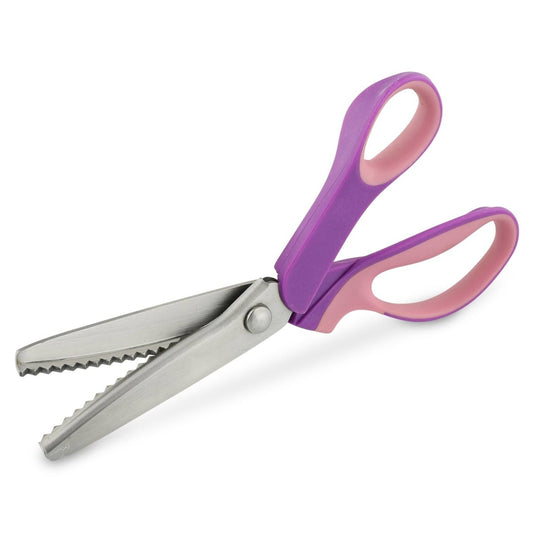
Pinking Shears for Fabric
Front and Back Panel
If you want to know more about the dimensions you need for the front and back panel, go back to step 1. As I’m using two big beach towels, I used the dimensions of those towels so I can also take advantage of the finished edges of these towels as much as possible. If you can do that, it saves a lot of time in finishing edges or hemming at the end.
If the panels consist of different pieces of towel fabric, clip and sew them together right-sides facing and finish the edges. In my case I decide to have the brown fabric on my shoulders and the green towel on the bottom part. The hood will also be cut out of the brown towel.
The Hood
For the hood, fold a hood from a sweater/sweatshirt in half, put it on your double folded fabric. Copy it with enough seam allowance ( ⅝ inch) onto your towel fabric and cut out the two pieces. Try to match the finished edge of the towel with the front edge of the hood so you don’t need to finish these edges.
If you want the hood to match the neckline, make sure that the bottom part is the same size. I cut my hood a little too small. I made each piece 11 ½ inches but they should have been 14 ½ inches to match the neckline completely. Don’t make my mistake. 🙂
4. Assemble the Hood
To sew with towels or terry cloth, you don’t necessarily need a specialty presser foot. When the layers get too thick to sew over them comfortably, you can opt to use a walking foot or get help from a bulky seam jumper. Both of these tools are great to sew over thick seams.
 SOLD OUT
Bundle & Save
SOLD OUT
Bundle & Save

Bulky Seam Jumper - Get Consistent Stitches When Sewing Over Seams & Bumps
You have different options to sew these two fabric pieces together.
- The first one is the easiest: Sew the rounded seam of the two pieces for the hood together, right sides facing. Finish the raw edges with a serger or an overlock stitch and an overlock foot.
-
If you want the raw edges to be hidden, you can use a flat felled seam. I recently wrote a tutorial about this type of seam. The advantage of a flat felled seam is that the raw edges are hidden on both sides, which is perfect for a hood without lining. To sew this seam, you need some extra seam allowance, a ⅜ of an inch allowance is not enough.
Finish the raw edges of the bottom seam of the hood with a serger or an overlock stitch and an overlock foot.
If you want to add a front pocket or some extra embellishments, attach these to the front panel before step 4.
5. Sew The Shoulder Seam
-
Mark the following points on the back panel and the hood: a, b and c
- the center of the top edge of the back panel (a)
- the middle of the two hood pieces at the bottom edge, (b) and (c) + measure how long this is (= ¼ of the total bottom seam of the hood)
- copy that distance from the hood on the shoulder edge of the back panel, from the center towards the shoulder, on both sides, mark (a), (b) and (c). You need these marks on the back panel to know where to stop the shoulder seam.
-
Place the front panel and back panel on top of each other, right sides together, and clip together from each shoulder up to mark (b) and (c). When working with thick towels, sewing clips really are a big advantage compared to pins.
-
Sew the shoulder seam closed from one shoulder point to mark (b) and from the other shoulder to mark (c), right sides facing.
 SOLD OUT
Bundle & Save
SOLD OUT
Bundle & Save

Sewing Clips - multicolor - 50 pcs/box
If you think the opening for the head might be too small, you can also sew a little more of the hood on the back panel. On the front panel the hood parts will not touch, which is totally ok. To accomplish this, stop sewing 1 inch away from the mark on each side. You’ll have a 2 inches of neckline at the front and a wider head opening.
6. Attach The Hood
- Match the center of the back panel with the sewn seam of the hood and pin or clip together, right sides facing.
- Pin the bottom seam of the hood to the neckline from that middle point on, also right sides facing. Sew together.
- Depending on how big you made your hood, you might need to cut a little slit in the front panel to make the opening for the head big enough. Know that if you do this, you will need to finish that edge.
7. Finish the Neckline
Depending on your towel’s edge, you will need to finish the edges of the front neckline with a double folded hem or some bias tape. You can also do this for the inside of the neckline that might be showing when you don’t wear the hood.
If you follow this link, you learn how to attach bias tape to a project.
8. Close the Side Seams
You can close the side seams completely - except for the arm hole of course - or leave a slit at the bottom. This is up to you.
My armholes are 12 inches from top to bottom and I made the slit the same size, 12 inches from the bottom hem.
Measure and mark your armholes and slits and sew the remaining seams closed, right sides facing.
If you are having trouble sewing over thick seams with your home sewing machine, maybe try a walking foot or a bulky seam jumper. In the image below, you see me using the bulky seam jumper to sew over the seam that attaches the two different towels.
That’s it. This XL surf changing robe or hooded beach towel is ready. It is very cozy and warm on a windy day and truly practical to get changed under comfortably. I’m very happy with this beach robe and -of course- my daughter wants one too! I still have three old beach towels in my closet. I know what to do this weekend!
Any questions or tips? Don’t hesitate to send me an email an@madamsew.com
Happy Sewing!
An
Blogging for MadamSew.com


