A Beginner's Guide to Sewing on a Patch
Sewing on a patch can be a way to repair clothing and get a longer use of them but it can also be a fun and rewarding way to personalize your clothes, bags, or any fabric item. Whether you’re looking to add a stylish touch to your jeans or repair a hole in your favorite jacket, this step-by-step guide will help you sew on a patch with ease. Follow along with these instructions and helpful visuals to ensure your patch is securely and neatly attached.
Not all patches are created equal. Choosing the right patch for your project depends on the type of fabric, the purpose of the patch, and your personal preference. Do you need a quick fix, a durable solution, or a decorative touch? First, I will help you understand the different types of patches and how to choose the right one for your project. Then, I will explain what the best way is to sew on a patch.
Types of Patches
The first distinction can be made based on the way the patches are attached.
1. Iron-On Patches have a heat-activated adhesive on the back. You apply them with a hot iron. They are used for quick repairs and decorations on light to medium-weight fabrics such as cotton. These may not adhere well to thick or textured fabrics and can peel off over time with frequent washing.
2. Adhesive Patches have a sticky back and can be applied directly to the fabric without heat or sewing. Use these for temporary fixes or temporary decorations and items that won’t be washed frequently. They are very easy to apply but not very durable.
3. Sew-On Patches are sewn directly onto the fabric, making them more secure. It will take a little more time to apply but you can use these on most types of fabrics and they can be washed frequently.
The second distinction is the way the patch is made, including the materials and techniques used.
1. Embroidered Patches are build out of threads stitched into a fabric backing. Logos or emblems are often embroidered. They are durable and long-lasting, can be beautifully detailed but can be bulky on lightweight fabrics.
2. Printed Patches have designs printed directly onto the fabric. These are best for detailed images or graphics and can be used on lightweight fabrics. They are less expensive and less durable than embroidered patches. They may fade or crack over time.
3. Leather Patches have a more classic look. They are durable, often used on denim, jackets and bags. Leather can be more difficult to sew and is not suitable for lightweight fabrics.
4. Chenille Patches are made from a fuzzy material that creates a 3D effect. They are commonly used on varsity jackets and sports uniforms. They have a unique, textured appearance. They are bulky so they are not suitable for all fabrics and are typically more expensive.
There are some really beautiful iron and sew-on patches out there, little pieces of art. Scroll through Etsy or check out Macon & Lesquoy. If you are ever in Paris, you should visit their flagship store! You can also have them custom made.
General Preparation
If you're covering up a tear, clean it up a bit before you start to sew your patch on. Cut off any of the (white) thread ends and fluff that may appear around the tear and maybe reinforce the tear with some fusible stabilizer. If you think the hole or tear might get bigger over time, sew it closed with a hand stitch.
Look at the patch you purchased or got. Check the back. If it looks shiny or has a thin paper covering it, it is probably an iron-on or adhesive patch. Even if it is one of those two, I would advise you to sew it down anyway to avoid it coming of in the laundry.
Make sure you place the patch as intended. A misalignment is a very common mistake, so be sure to use enough pins or fabric adhesive to hold the patch in place or even baste stitch the patch to the fabric or use a fabric marker to outline the placement if necessary. If the patch moves during sewing it is also difficult to keep the stitching even
Sew on a Patch By Hand
This is the most preferred method of attaching a patch. It is durable and you can maneuver more easily than with a sewing machine. On a sleeve for example it is very hard to not sew the sleeve closed when you want to sew your patch.
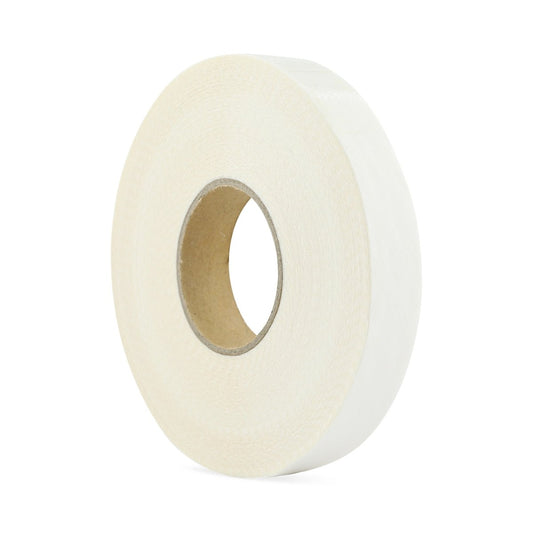
To sew on a patch by hand, get needle and thread, scissors, pins and a thimble. Select a thread that is similar to the outer edge of your patch if you want the stitches to be subtle. If you want, you can use an embroidery hoop to keep your fabric tensioned and flat while you sew the patch in place. Pin the patch where you want it on the project. If the patch is too thick for pins, consider gluing it onto the fabric. When it is an iron on or it has a sticky back, just follow the instructions that came with it and iron or glue it into place. You can also use regular scotch, fabric glue or even the Madam Sew double sided hem tape to hold the patch in place temporarily.
Cut a thread piece of about 18 inches long, thread the needle and tie both thread ends together. You will sew with a double thread. Start sewing from the backside of the fabric to hide the knot. Use a regular stitch, a slip stitch or a back stitch around the edge of the patch. With a regular stitch you can make your stitches almost invisible on the patch. The stitches of a back stitch are more visible but the result is a little more secure than with a regular stitch. In the boxes below these three hand stitches are explained.
 ADD TO CART

Fusible Hem Tape (50 yards); available in two widths
In any way, try to keep your stitches small and perpendicular to the patch. This means that when you go through both layers your needle doesn’t go diagonally. Stay close to the edge and try to keep your stitches as small as a quarter of an inch (or even smaller) apart from each other. Using a thimble helps a lot when pushing a needle to though fabric. Hand sew all the way around and finish off with a little knot to secure the threads. If you run out of thread as you’re hand sewing, just knot it off and pick up where you left off with a new thread.
How to sew a patch with a regular stitch
- Push the needle straight through both layers from the back.
- Go down one eight of an inch (or one millimeter) to the left from where you came up and go down again, through both layers again. You stay as close as possible to the patch edge.
- Then move to the side, about a quarter of an inch, go up again through both layers.
- Go down again one eighth of an inch (one millimeter) to the left from where you came up, through the patch and go down again.
- Continue these steps until you sewed all around the patch and don’t forget to lock the thread.
 ADD TO CART

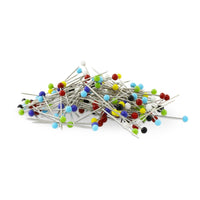
Glass Head Pins - Heat Resistant; 200pc Value Pack
How to sew a patch with a back stitch
- Start by pushing the needle up through the fabric and the patch and bring it all the way through through so the knot is on the back.
- Push your needle into the fabric and patch about ¼ inch to the right from where your needle came up before. Push the needle all the way through.
- Now come up with the needle ¼ of an inch to the left of your first stitch. Put your needle back down into the hole where you started.
- Continue backstitching until you reached the point where you started.
- Don’t forget to lock the thread.
How to sew a patch with a slip stitch
- Push the needle straight through both layers from the back.
- Push your needle into the fabric, right next to the patch, straight dow, keeping the stitch perpendicular to the patch edge.
- Come up again about ¼ inch to the left from where your needle came up for the stitch before. Push the needle all the way through both the fabric and the patch.
- Go down again next to the patches edge and come up ¼ inch to the left.
- Continue doing this all the way around.
Sew on a Patch with a Sewing Machine
You can also use a sewing machine to sew on a patch, if your sewing machine and needle can handle thick layers and if the position of the patch allows you to just have the fabric layer and the patch under the machine, which is not always easy with finished clothing. Very small and intricate patches can also be very difficult to maneuver around with a machine. Take that into account as well before you put it under the machine.
Use a sturdy needle (denim, size 80 or more) and make sure the thread tension is ok before you start.
- Glue or pin the patch in place.
- Use a straight stitch with a length of 2.5 and sew around the outline of your patch, if you want to keep the stitches as subtle as possible. If you have a clear presser foot, I would use that one to get a better view of where you are sewing. You can play with the type of stitches and the color of thread if you want to. Using a dense zigzag stitch for example will add an extra edge to the patch.
- Put the patch and fabric under your sewing machine. First test slowly if your sewing machine can handle sewing through the patch and your fabric.
- Try to sew as close as possible to the edge of the patch.
- Backstitch at the end to secure the thread.
How to Make a Patch
You can also make a patch yourself. There are many different ways to create a patch. You can embroider a design on a sturdy piece of fabric with a sewing or embroidery machine or by hand. You can use a cutout from a fabric with a shape or a fabric drawing that you like. You can work with beads, sequins or other embellishments. Faux leather and felt are also great materials to use for patches.
A patch is usually made out of two or three layers, one fabric layer with the design, some stabilizer in the middle and a backing fabric or an adhesive sheet at the back for some extra firmness and a finished look. The adhesive sheet can be heat-activated, with fabric glue or just sew-on backing.
Finish the edges of the patch with a dense zigzag stitch or use fabric sealer or fray check to prevent the edges from fraying.
Conclusion
Sewing on a patch is a straightforward process that can add a personal touch to your items or extend their life. By following the tips and step-by-step instructions, you can ensure a neat and secure attachment of your patch. Hand sewing might be preferable for intricate or delicate fabrics, providing more control over the process.
Share your questions or patch projects with us in the comments below! If you have any other tips or techniques for sewing on patches, we’d love to hear from you. Don’t forget to subscribe to our blog for more sewing tutorials and DIY projects.
Happy sewing!
An
Blogging for Madam Sew


