Everything You Need to Know About Your New Madam Sew
12.5" Square Up Quilting Ruler!
Introduction
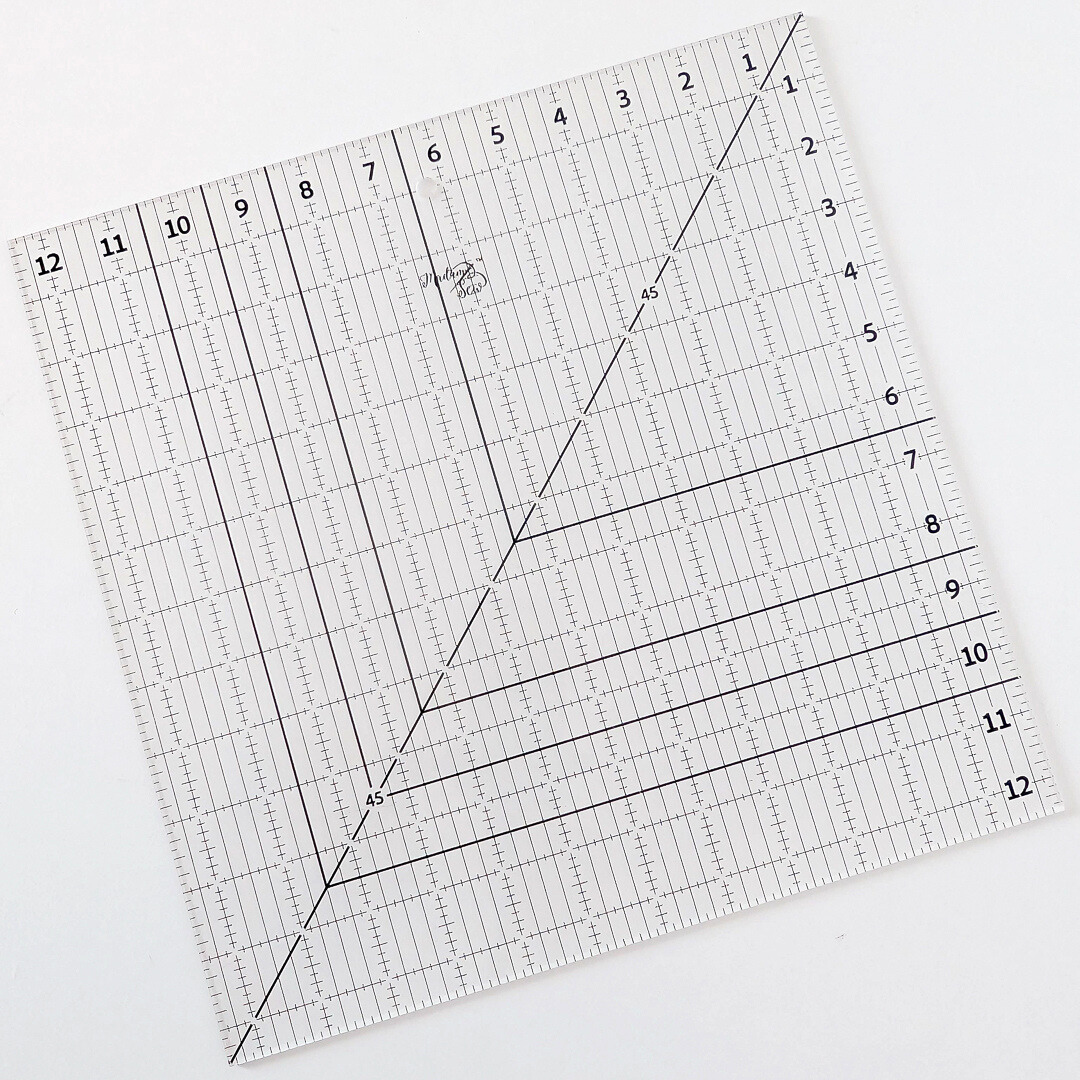
Using the Madam Sew 12.5” Square-Up Quilting Ruler will make squaring up your quilt blocks or half-square triangles (HSTs) easier and faster. You should square all of your quilt blocks to the same size before putting your quilt top together. Doing so will make it easier to match things up making your quilt project come together more accurately and resulting in a more square quilt top.
When you sew quilt blocks, units or even half-square triangles, they don’t all come out perfectly, at least not in our experience. It could be because your cutting wasn’t flawless, your sewing wasn’t straight, your seam allowance was a bit off or if you did decorative embroidery it might have misshaped your block.
Many quilters try to square up their quilt blocks with regular quilting rulers, such as a 6”x24” ruler, and a cutting mat as a guide. Others gather a bunch of square rulers for all of the sizes they are working on. So why this ruler? It’s designed so you just need one square up ruler or at most two…like a 6” square ruler and this one.
The following instructions will walk you through the steps to quickly and efficiently make all of your blocks match in size. But first some details on why this ruler is special.
What Makes the Madam Sew 12.5” Square-Up Quilting Ruler Different From Other Rulers?
-
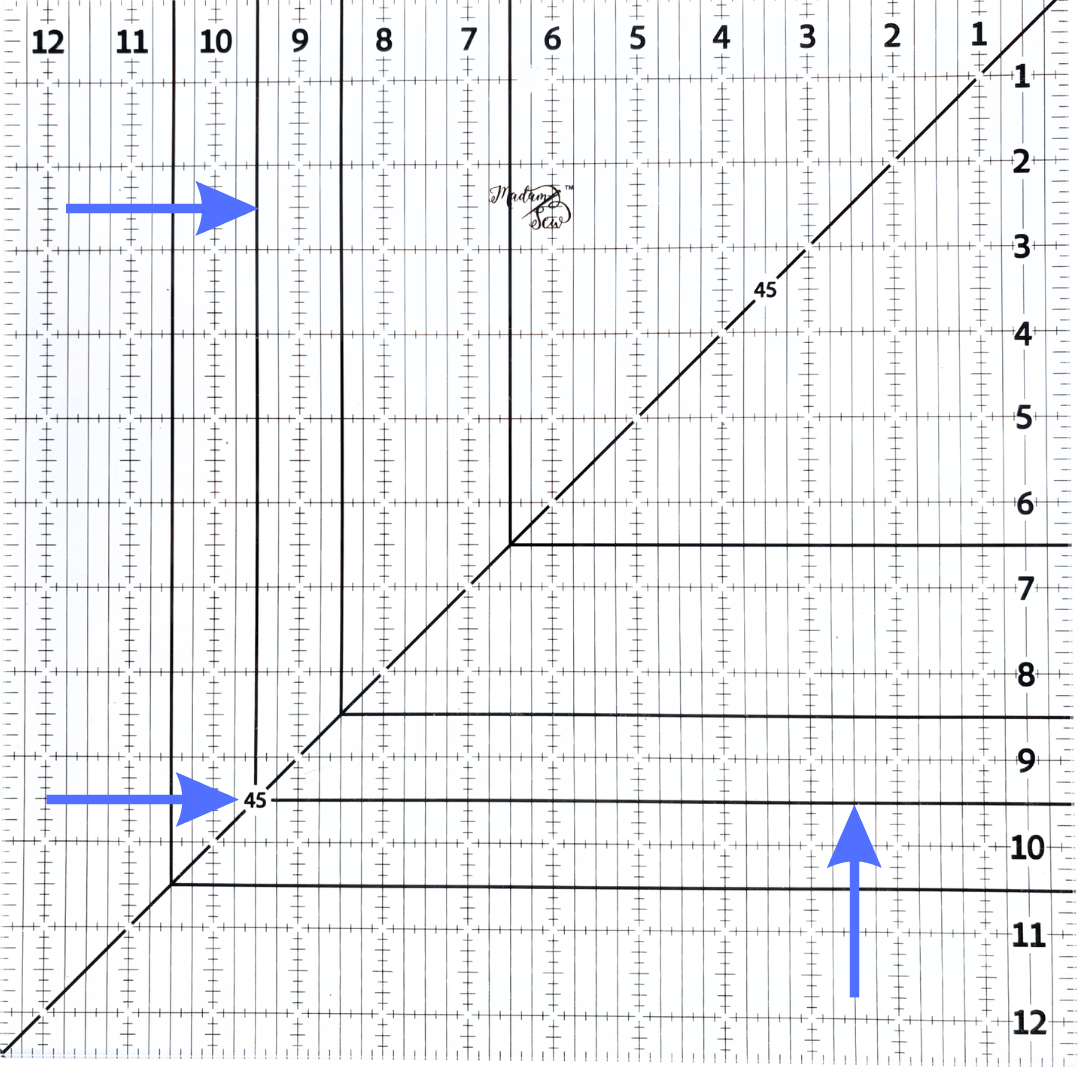
We’ve incorporated special bold lines at the 6.5”, 8.5”, 9.5” and 10.5” measurements and made our ruler 12.5” square.
-
These correspond to the popular finished block sizes of 6”, 8”, 9”, 10” and 12”.
-
The seam ¼” allowances you need when making these size blocks has already been incorporated into the guidelines so you don’t have to add them yourself.
-
-
-
We included a 45 degree angle line to use when squaring up half-square triangles (HSTs).
-
We included large numbers and ⅛ inch, ¼ inch, ½ inch and 1 inch markings so you can easily square-up other size blocks if needed. All you need is a little Washi Tape, as a visual guide…if you want, to help you along. And you get accuracy down to ⅛” with these clean and clear grid-lines.
-
The ruler’s transparent matte technology allows you to see the ruler’s markings on both light and dark fabrics. This means no extra colors or markings to distract your eyes.
-
Also included is an Anti-slip Cohetec Coating so you get the right amount of grip to help keep the ruler from sliding easily and the ability to move it effortlessly when needed.
Squaring Up for Finished 6”, 8”, 9”, 10” and 12” Blocks Using the Pre-Printed Guidelines
To square up your quilt blocks for any of these finished block sizes, you will be using the corresponding, bold 6.5”, 8.5”, 9.5”, 10.5” lines or the entire ruler. For squaring up 12.5” blocks, the left and bottom edges of your ruler act as your guide. The instructions on how to do this are the same for each size.
Note: For our example we’ll be squaring up for 9” finished blocks. Your unfinished blocks need to be 9.5” square or a little larger before you start squaring up.
STEPS - Squaring up Blocks Using Preprinted Guidelines
-
Press your block before squaring. Get it as flat as possible. We recommend using a wool pressing mat to help get that crisp, flat press.
-
Find the 9.5” bold lines that run vertically and horizontally on the ruler. These lines are going to work as visual guides. We will be trimming two opposite corners each time we cut.
-
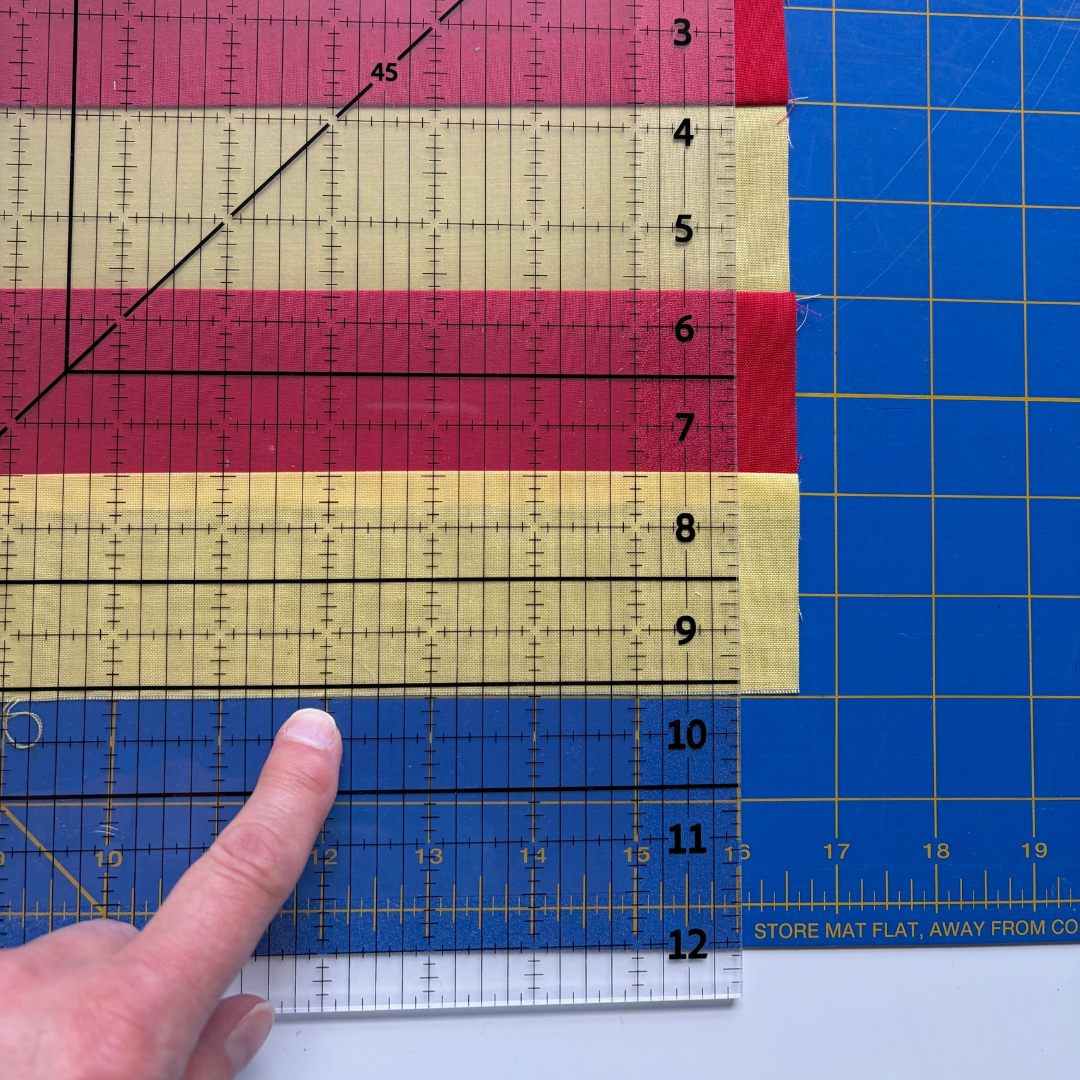
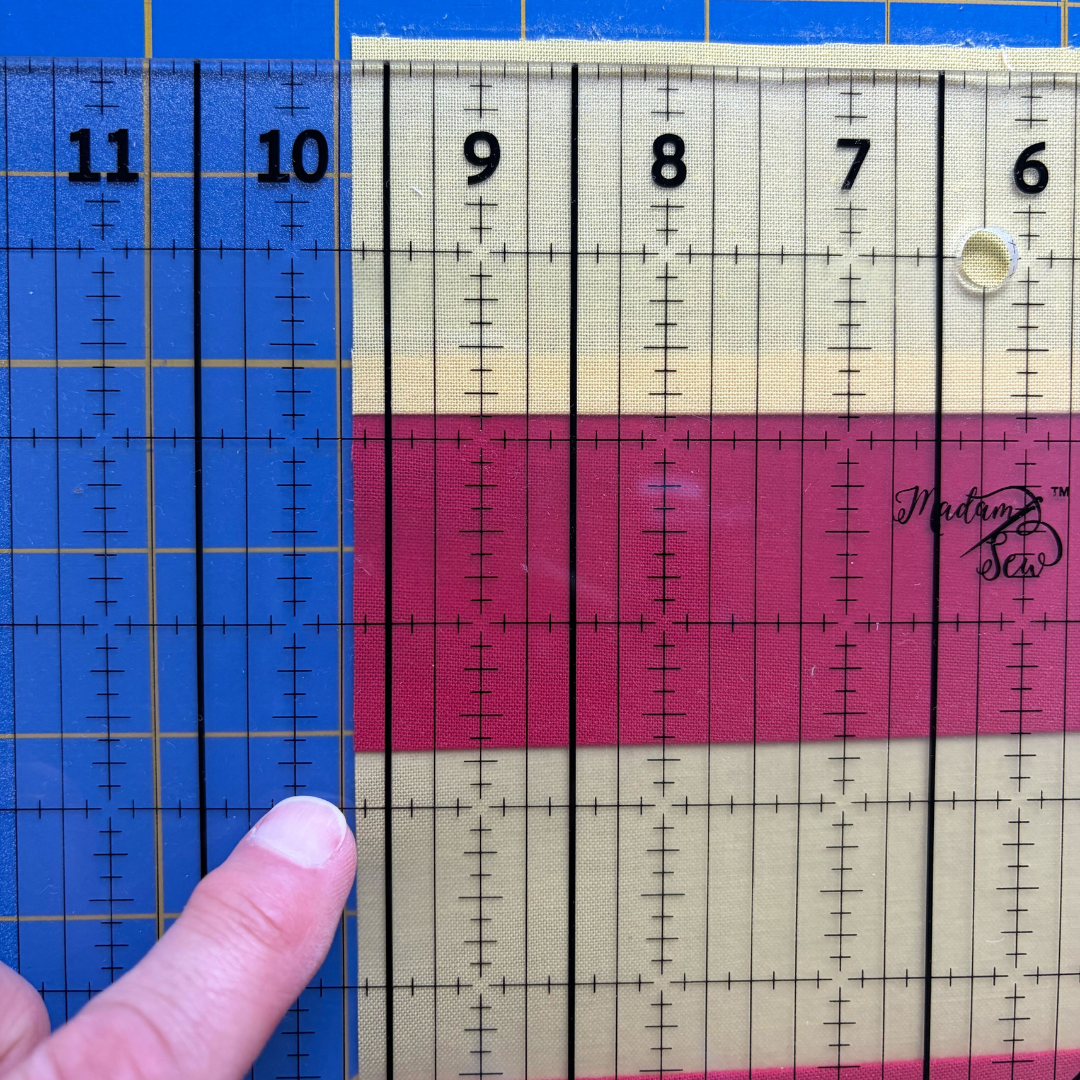
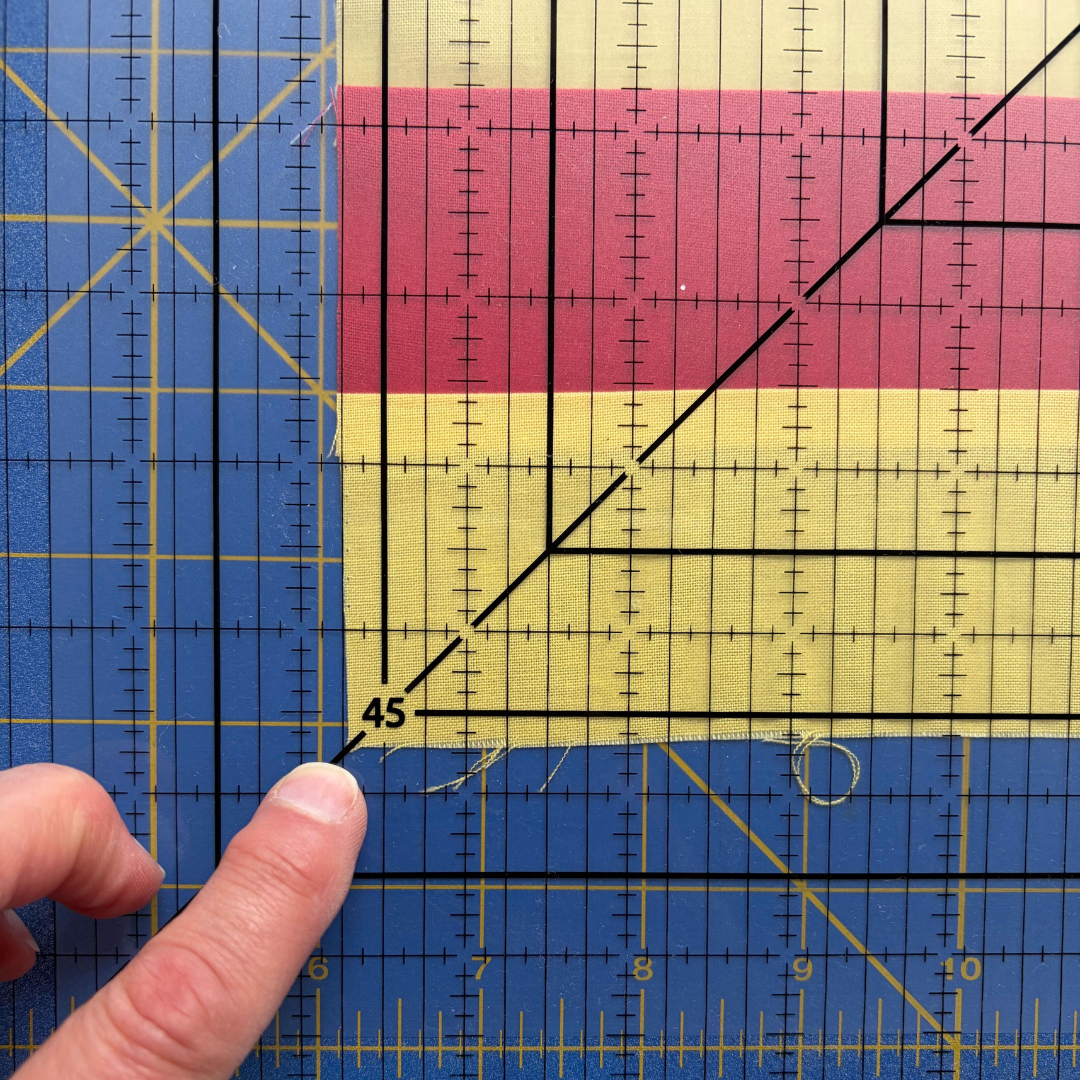
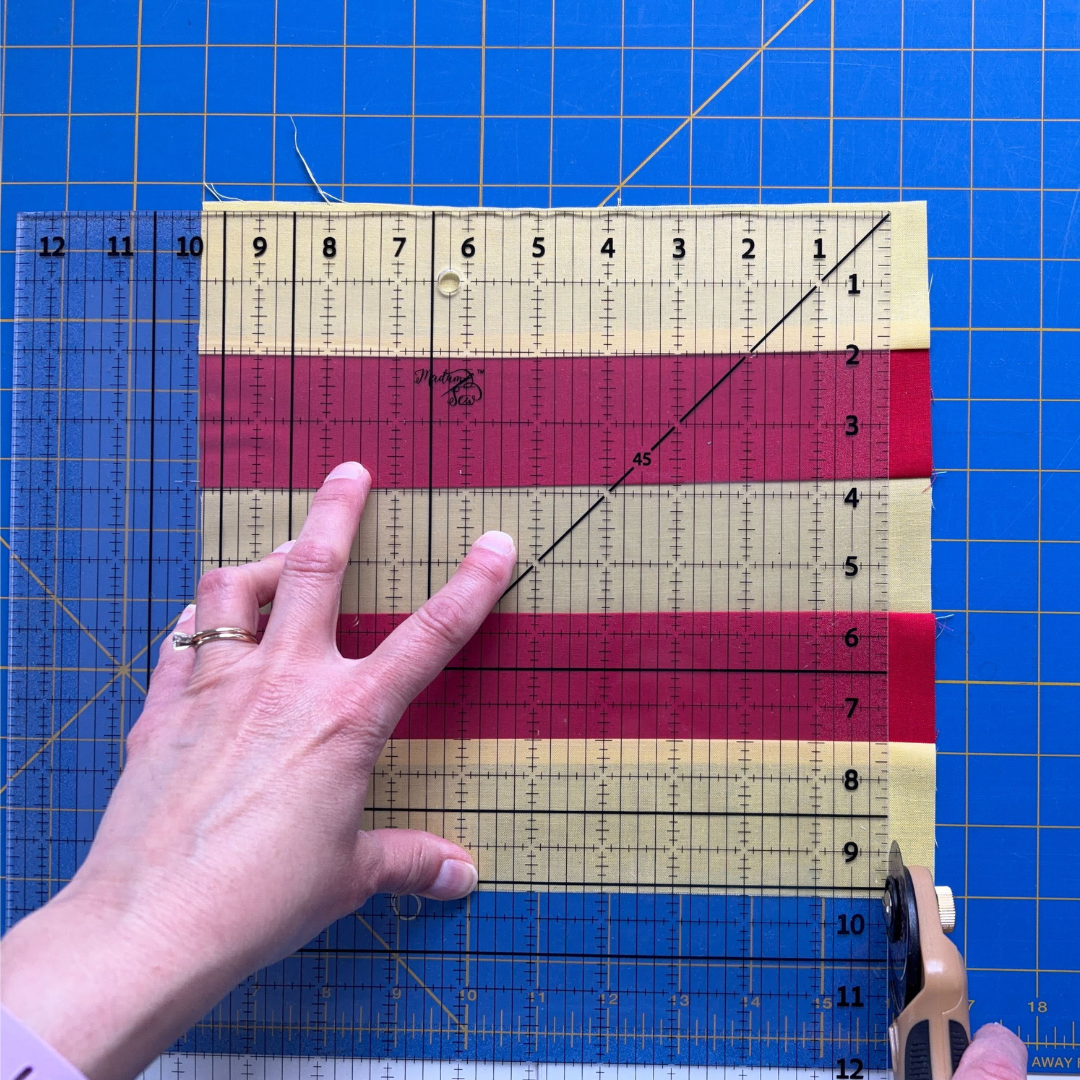
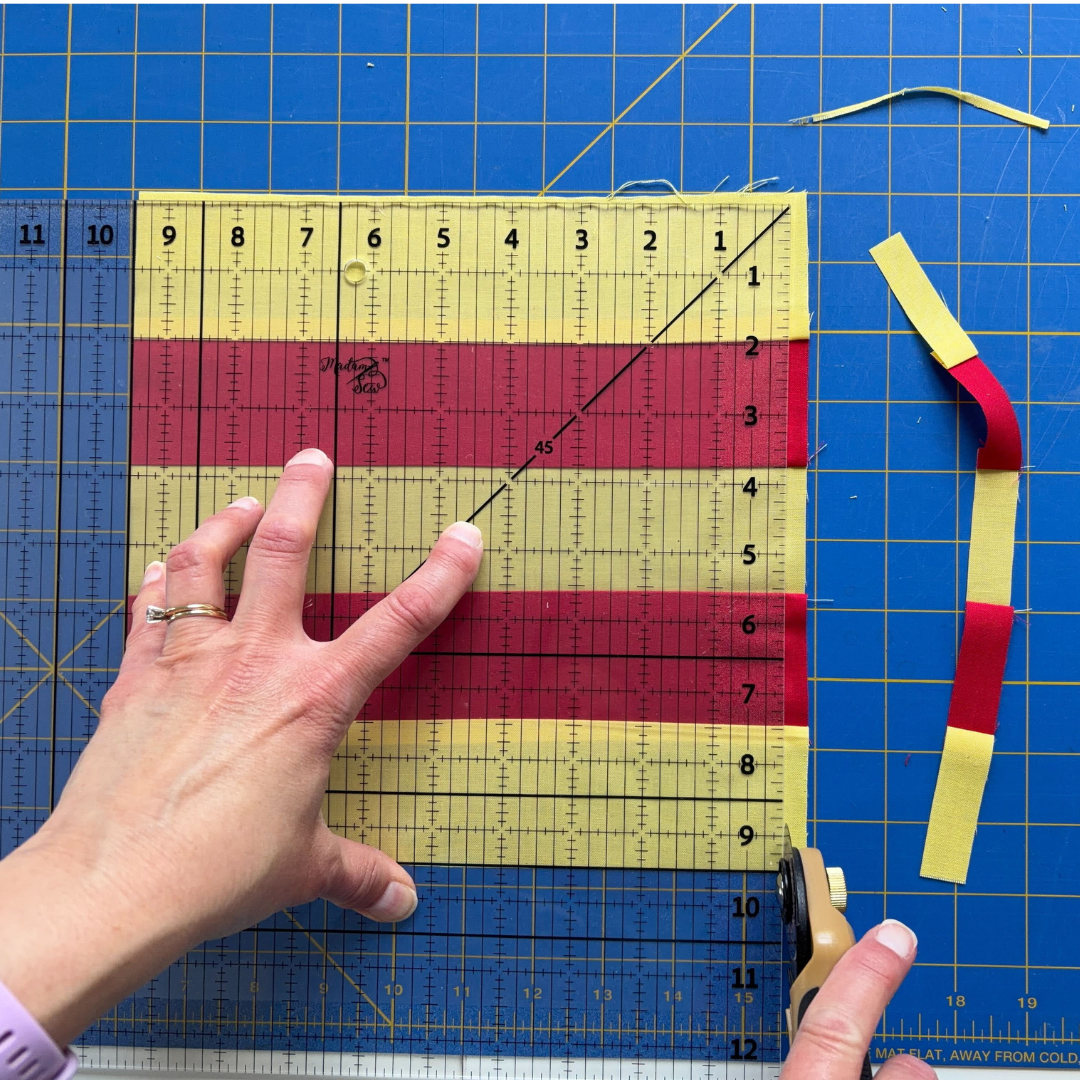
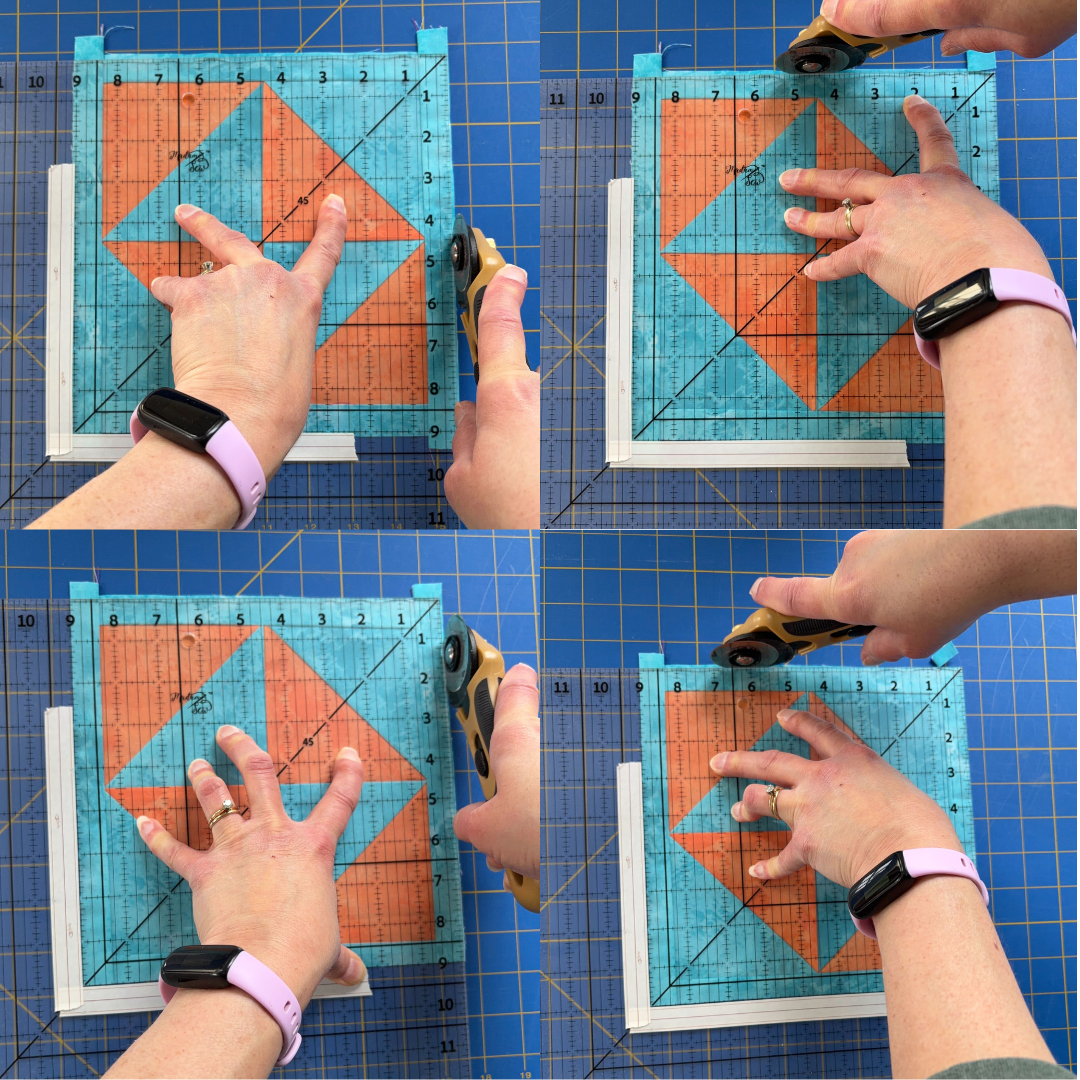
With your block on a cutting mat, place the ruler so that the 9.5” lines are a bit inside the edge of your block, on both the left side and bottom, as in the pictures below. For added guidance, you can use the 45 degree line to line up at least one corner and if possible, the approximate middle of your block and even the opposite corner.
-
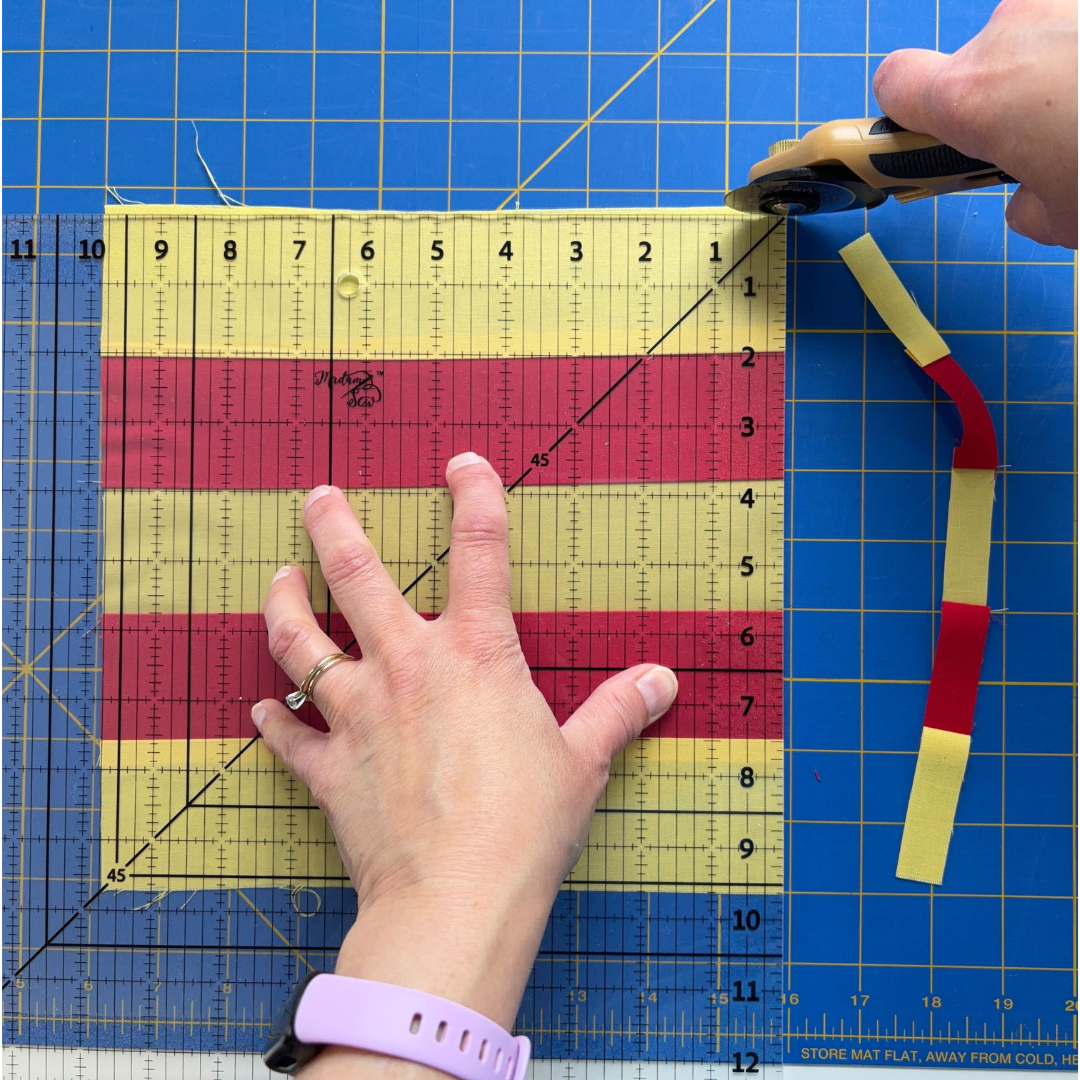
Hold your ruler down and with a rotary cutter, trim off the excess fabric along the right and top edges of the ruler.
-
Do not move your ruler yet! While holding your ruler in place, swipe away the excess fabric that you cut off. This way, if you need to re-trim your edges, you don’t have to realign the ruler again.
-
Remove the ruler and turn your block 180 degrees (that is two turns). The uncut edges should now be on the right and top of the block.
-
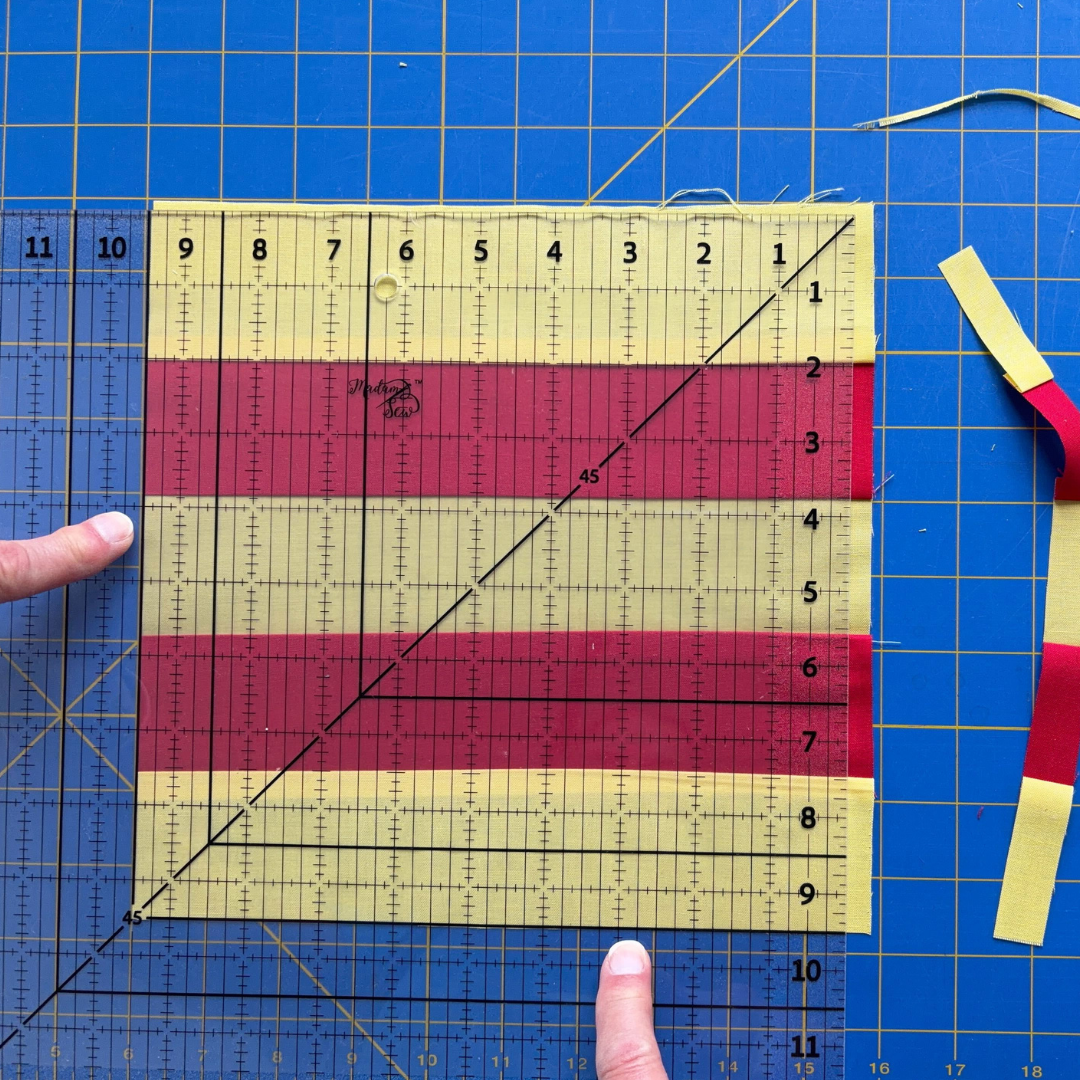
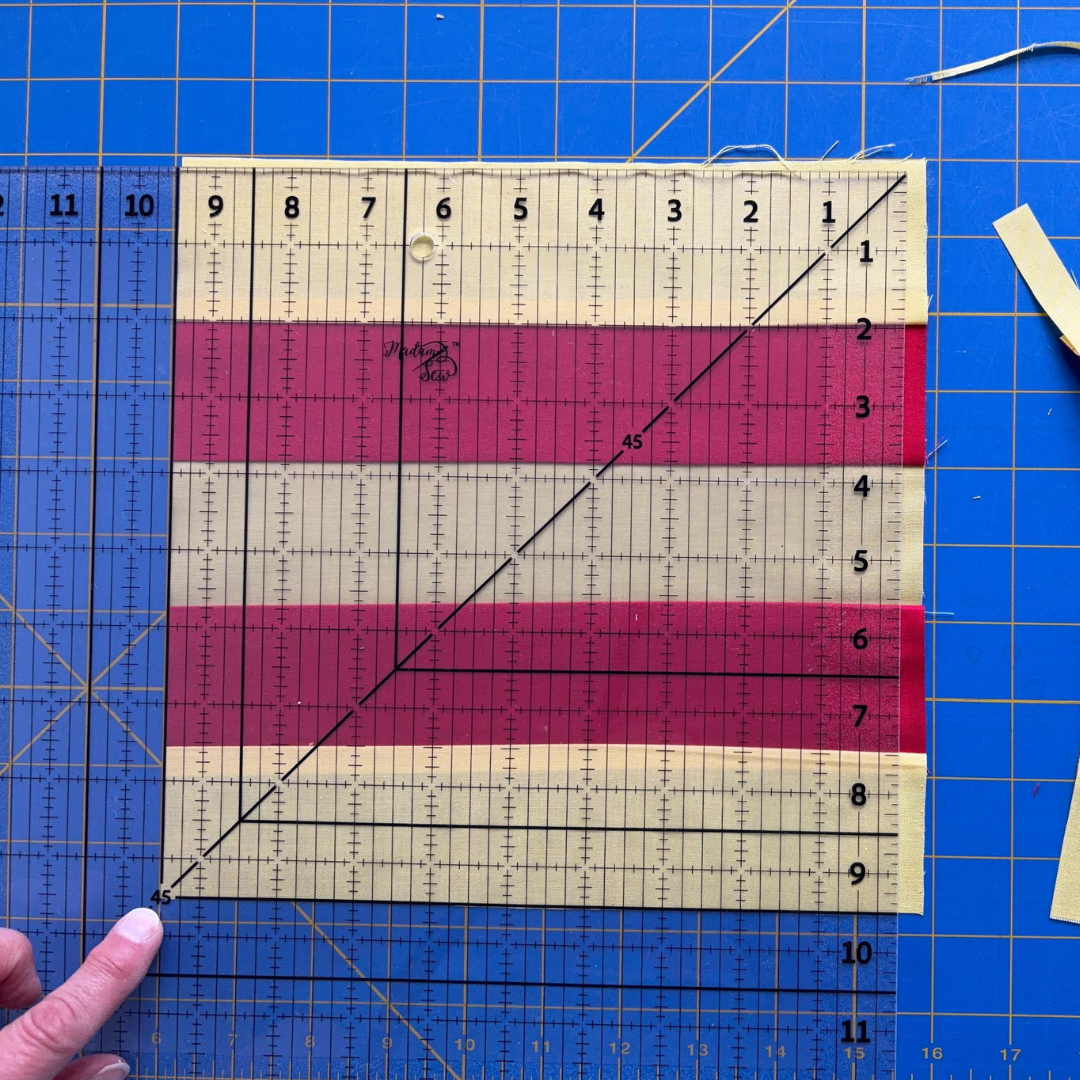
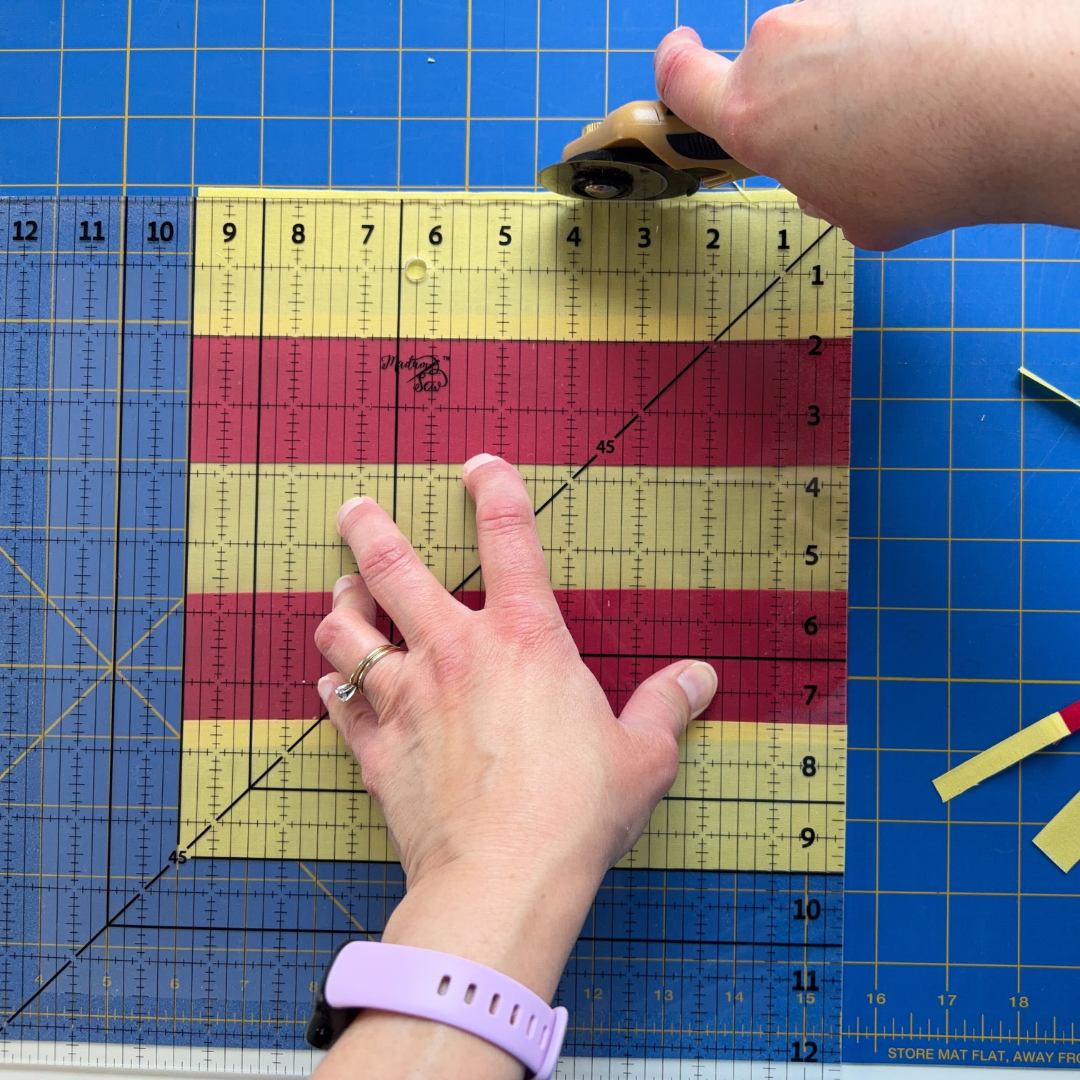
This time, place the ruler so that the 9.5” lines are on the actual edge of your block. The corner of the two cut edges should be on the 45 degree line.
-
Once again, hold your ruler in place and cut excess fabric along the right and top edges of the ruler.
-
Continue to hold down your ruler and swipe away the excess fabric.
-
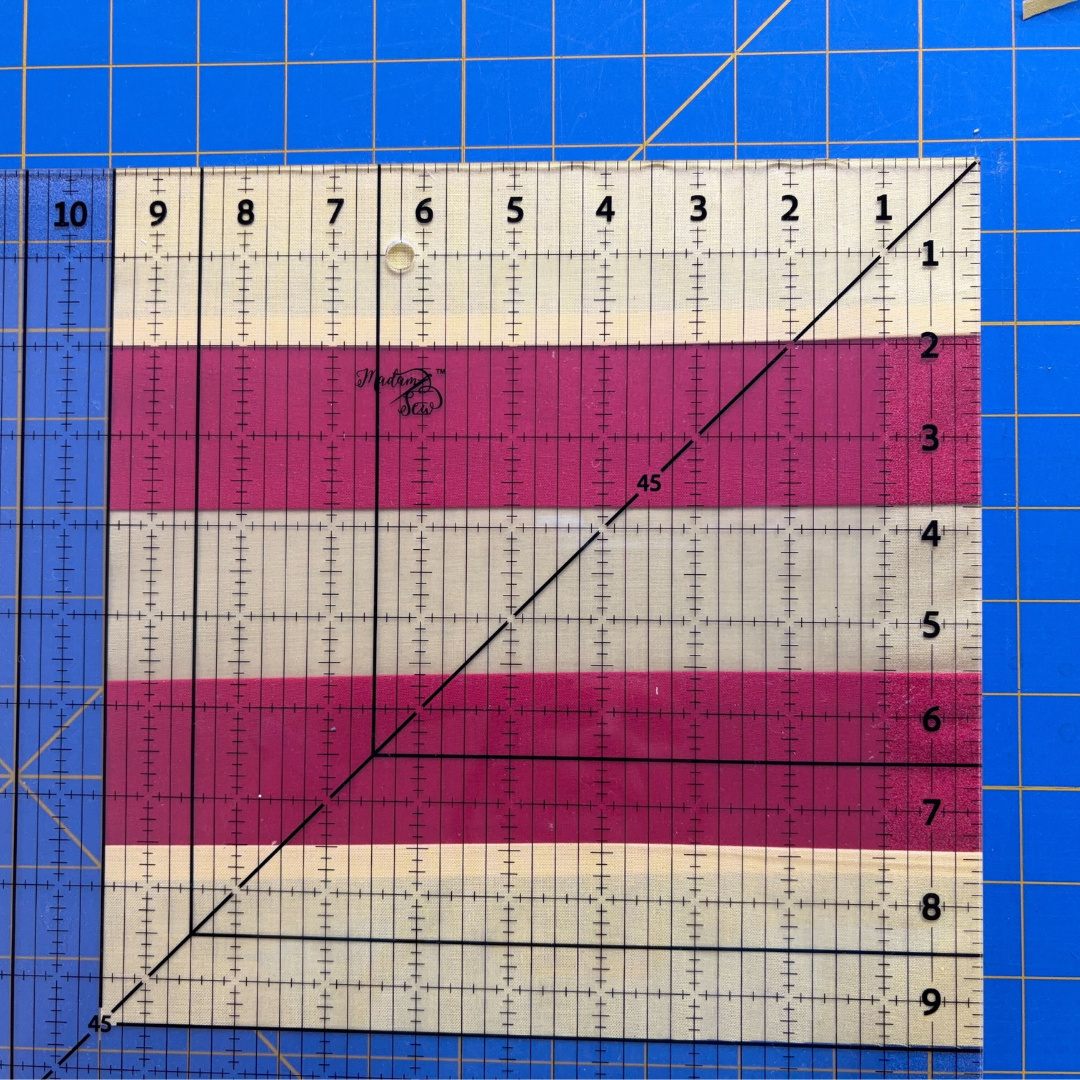
Using your cutting mat, double check that you do have a 9.5” block. If not, repeat the previous steps (2-9).
Squaring Up for Other Finished Block Sizes
You might not be making a block that we included bold guidelines for on the Madam Sew 12.5” Square-Up Quilting Ruler and that’s okay.
For this example let's pretend you are making a finished 8.5” block.
STEPS -Squaring Up Blocks When Not Using the Preprinted Guidelines
-
You can either just use the lines on your ruler, keeping track of your chosen measurements yourself, or gather washi tape to help guide you.
-
NOTE: Washi tape is safer to use on your quilting ruler because it is not likely to damage it or to leave a residue. We recommend washi tape over painter’s or masking tape because both of those could damage your ruler. This advice is based on us actually testing all three on quilting rulers. For the rest of this step, we’ll proceed as if you are using the washi tape.
-
-
Cut a piece of washi tape that is around half the length of the block you are squaring.
-
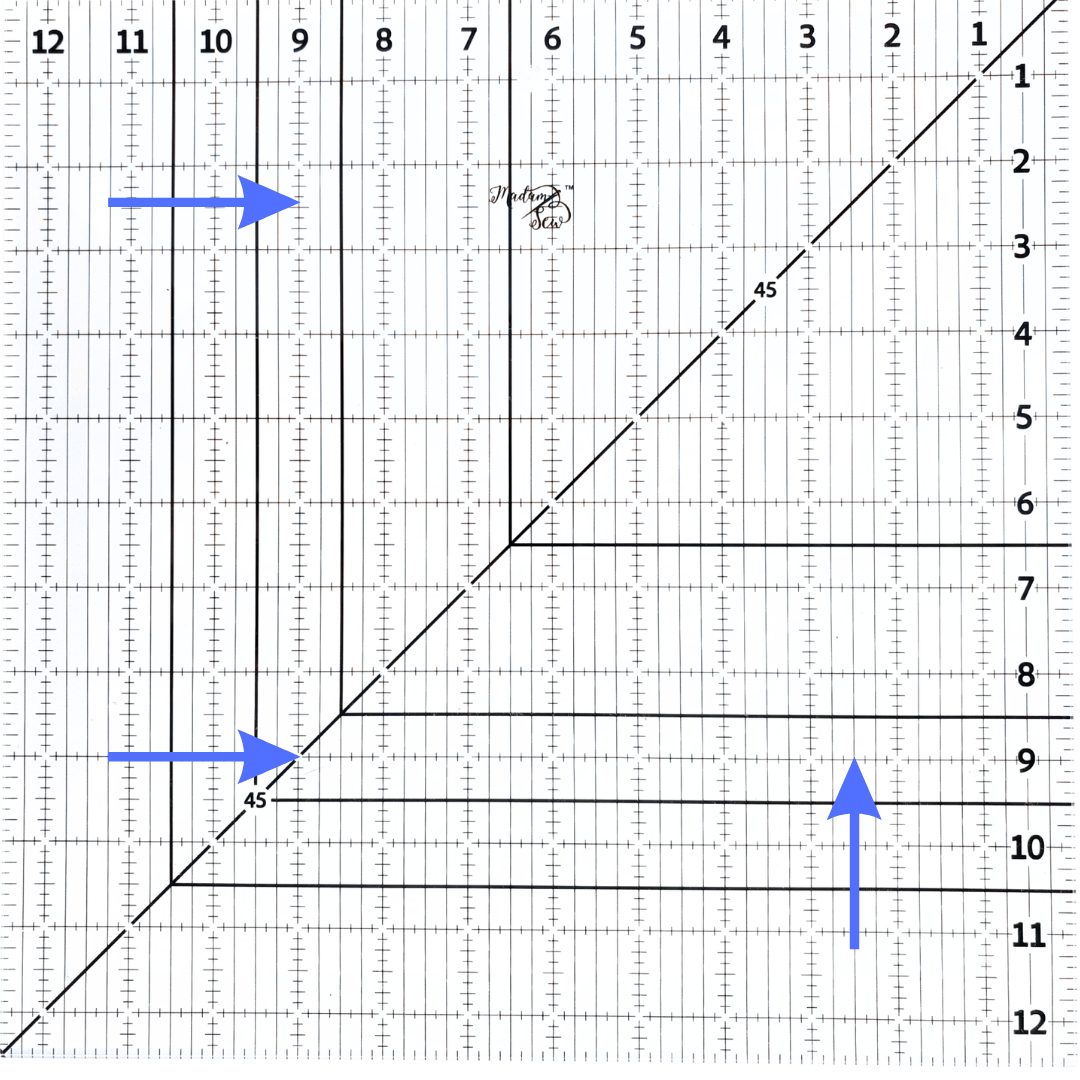
Find the horizontal and vertical line that corresponds to the size block you are making, plus the ¼” seam allowance.
-
For our block that line will be the 9” line because the finished 8.5” block will need ¼” seam allowance all around.
-
Now also find where the two lines intersect.
-
-
Place your washi tape so the top edge of the tape is on or just below to the horizontal 9” line such that it also crosses the vertical 9” line.
-
Now do the same with another piece of washi tape and the vertical line. The right edge of the tape should be on the line or just past it.
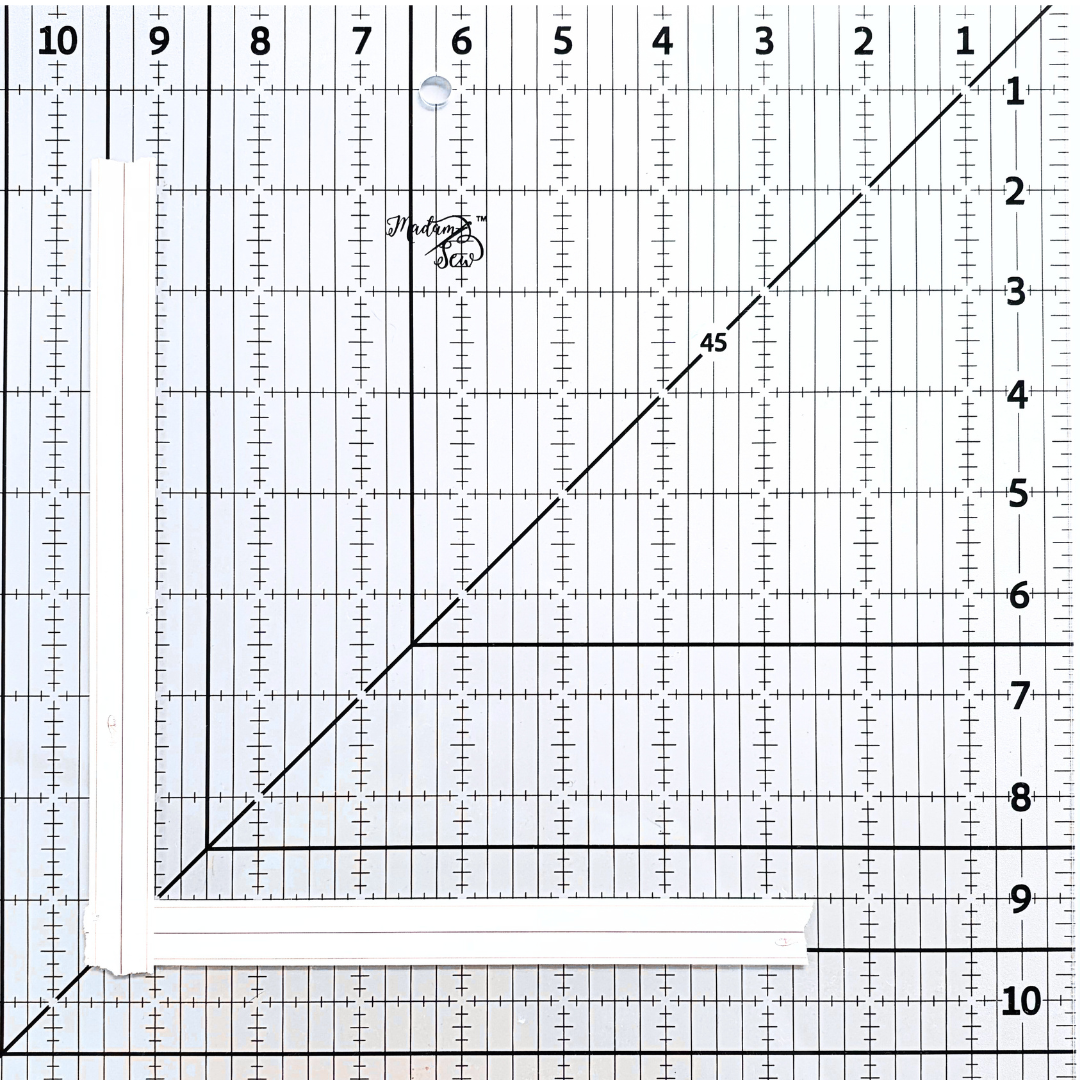
-
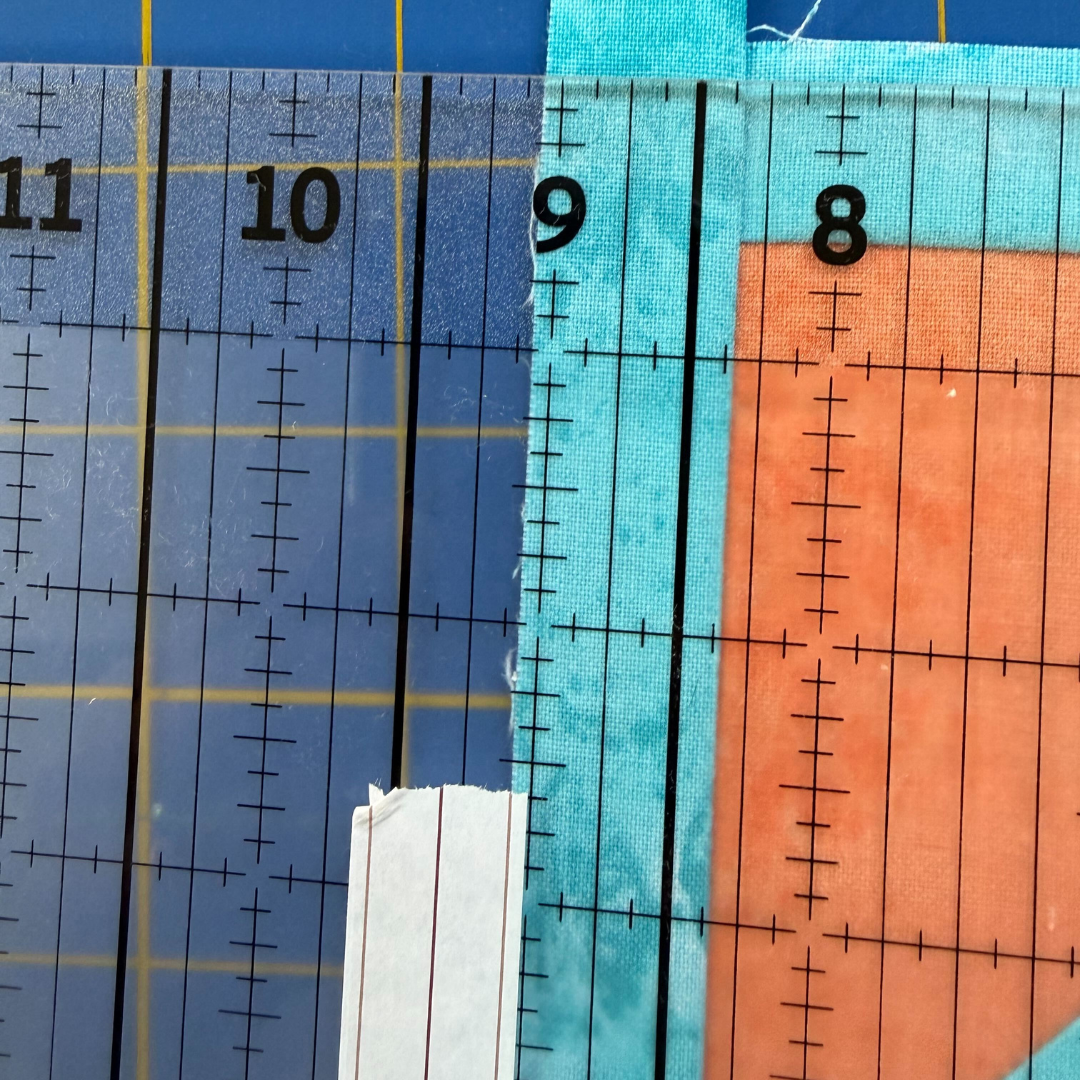
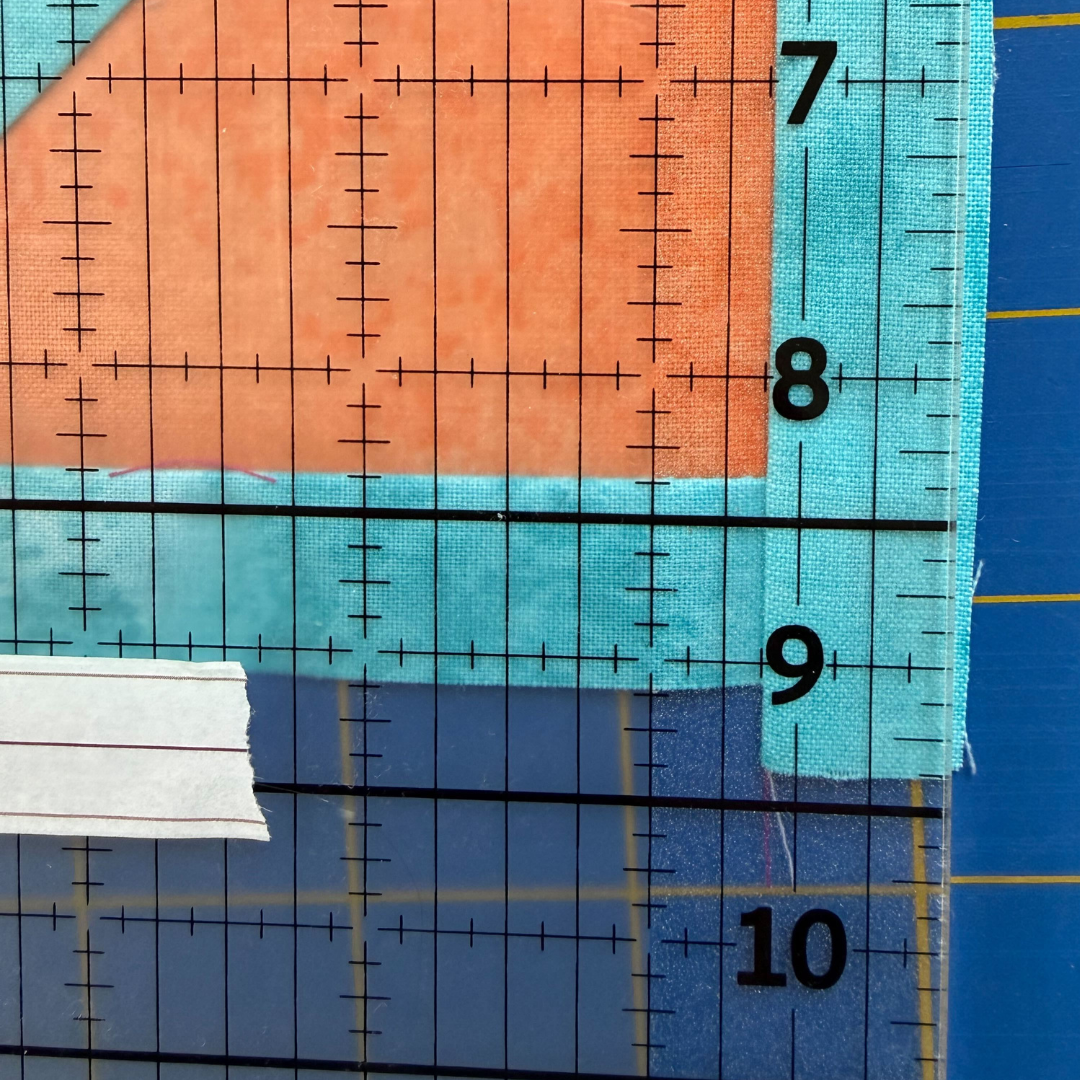
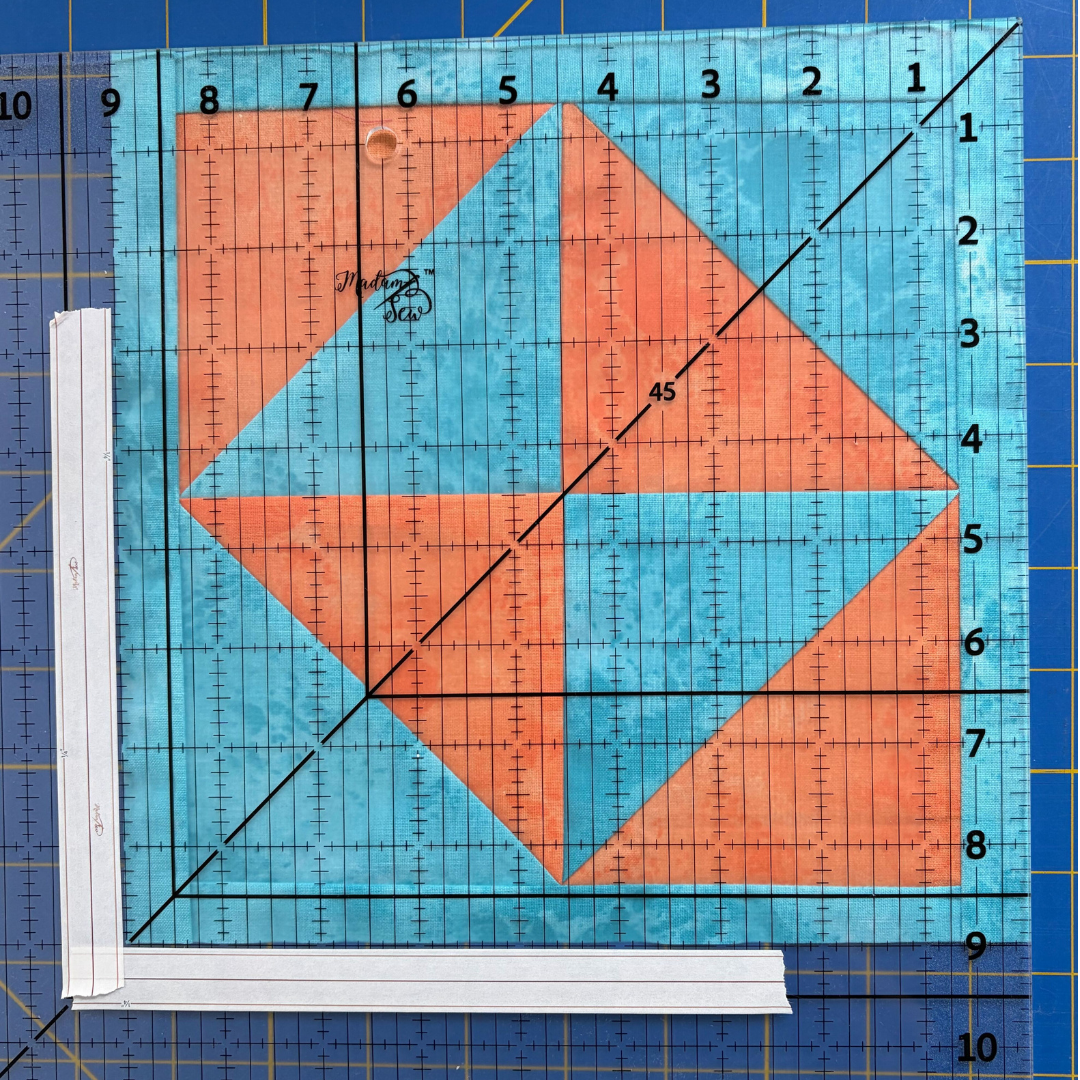
Now that you have created your “guidelines”, follow the instructions given previously for “Squaring up Blocks Using Preprinted Guidelines”…just remember to substitute your block size every time the 9.5” is mentioned in those steps. Below are some pictures for reference for this 9.0” example.
Squaring Up Half-Square Triangles (HSTs)
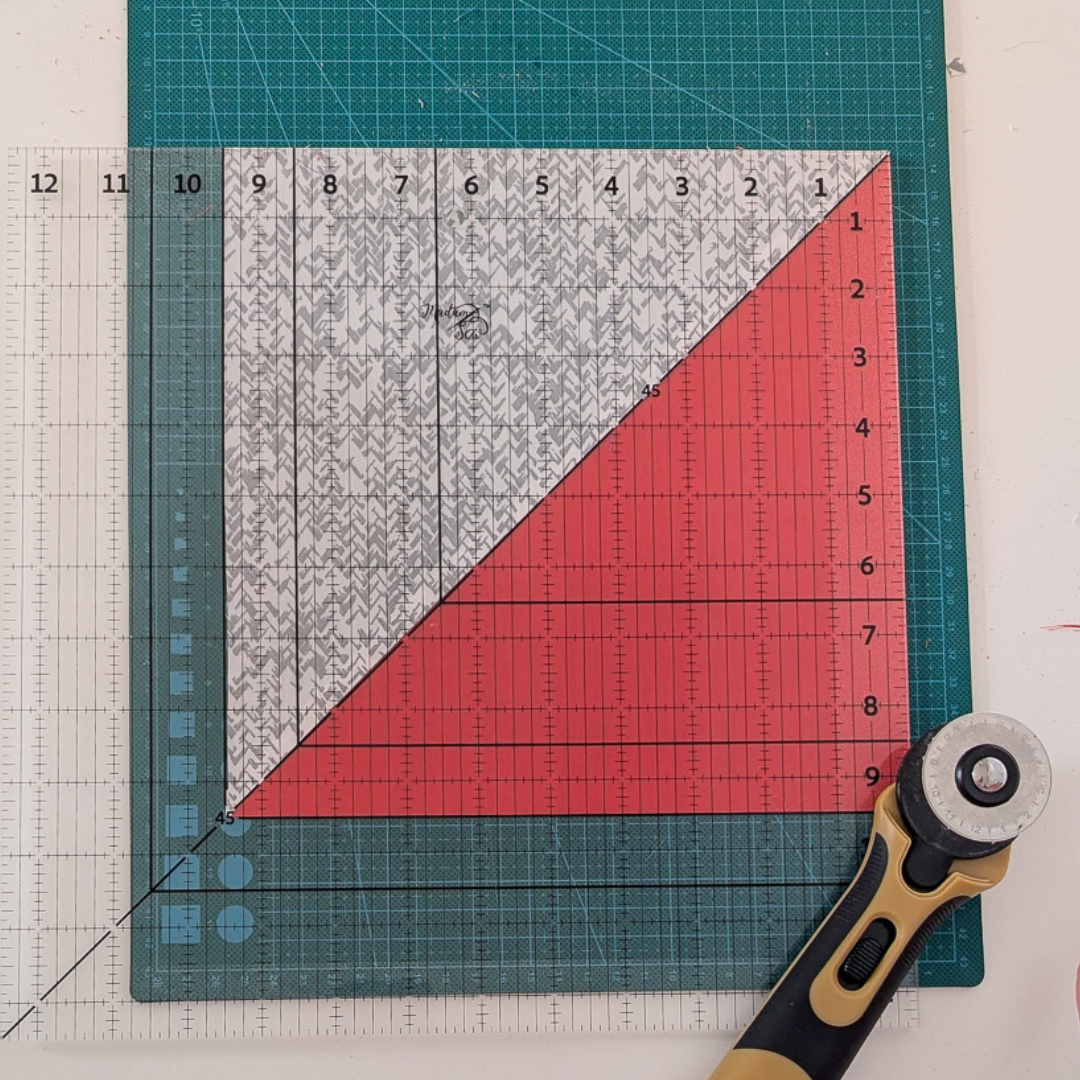
You can square up HSTs up to 12.5” in size with this ruler. To do so, you will be using the 45 degree line, and either the entire ruler, one of the bold guidelines or, if needed, Washi Tape to make your own guidelines.
The only difference in the steps between squaring up a regular quilt block and an HST is that when squaring up your HST, you want to line up the 45 degree line with the 45 degree line of your HST block. Then, just follow the instructions above for squaring up a quilt block. You’ll love the results!
Conclusion
The Madam Sew 12.5” Square-Up Quilting Ruler allows you to have one tool to square up many sizes of quilt blocks and half-square triangles. The included bold guidelines provide a great visual and save you time from creating your own guidelines for the most popular sized quilt blocks.
If, like some quilters, you prefer a smaller ruler to square up smaller blocks, then in addition to this ruler, grab our 6” Square Quilting Ruler and use the Washi Tape Method to square up blocks up to 6” in size.
You can make your blocks square and your quilt more accurate!
Interested in Our
12.5" Square Quilting Ruler?

12.5” Square Up Quilting Ruler
Create perfectly square, uniform quilt blocks with confidence using the Madam Sew 12.5 Inch Square-Up Quilting Ruler. Designed for precision and clarity, this versatile square quilting ruler helps you trim blocks up to 12.5” square with ease - so every quilt comes together beautifully and accurately.
Whether you're squaring up finished quilt blocks or trimming half-square triangles (HSTs), this ruler is an essential tool for accurate quilting and consistent results.