How to Make a Decorative Flag Garland
Last month it was my daughters birthday and I put up a paper flag garland. I’ve been using it already a couple of birthdays and now it’s time to throw it away… and make a garland that lasts and is pretty. This is a project that has been on my to do list for a while.. let’s get to it 😃
In this blog post I’ll show you how to make a flag garland out of scraps. In this project I make my own bias tape and show you how that can be easily done with a small tool, appropriately called a bias tape maker. You’ll see that this is a perfect project to make your own bias tape for the first time. I upcycled a used an old sheet for my bias tape.
The Supplies You Need
- Fabric for the bias tape:
I used an old white sheet, sized 34 by 34 inch, which gave me more than 7 yards of 1 inch wide tape.
- Colorful cotton fabric:
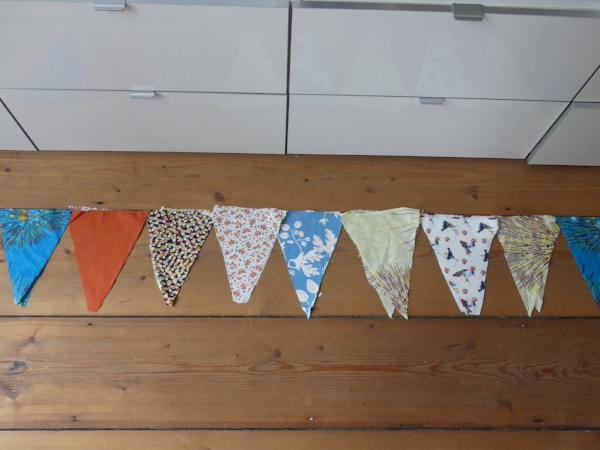
You can use leftover scrap fabric or buy some nice fabrics that match well. I used scraps so it’s difficult to say how much you’ll need. I made 37 flags, the triangles are 6 by 8.5 inch without seam allowance, you need 2 triangles for one flag so you can cut approximately 24 flags out of 1 yard of fabric , so 48 triangles…
- A rotary cutter, ruler and a cutting mat
- Fabric Scissors
- Pins and clips
- A bias tape maker for 1 inch wide single fold tape
- A peace of cardboard for the triangle flag pattern
- Your iron
- A sewing machine
- Matching thread
Check out the Madam Sew sewing and quilting collection to find all of the tools above.

Cut the Fabric Pieces
First cut the triangle pattern out of a piece of cardboard, a triangle, the pattern is available as a download below. Find the download for this pattern at the end of the blog and print it on your home printer.
Then take your fabric and start cutting. I started with my scissors but finally used my rotary cutter, you can cut two pieces at the same time if you want. Don’t forget to add 1/4 inch seam allowance. If you don’t you’ll have smaller flags. You will need 2 pieces for 1 flag: one for the front and one for the back. So 24 flags means you need 48 pieces and I needed 74 pieces for my 37 flags.


Sew the Flags
Sew the long sides at 1/4 inch seam. If you want you can pin the 2 pieces together before sewing. Leave the short side open for turning later on.
Turn each triangle right side out again. I used a crochet needle to get the point pushed out.Then press the triangles to flatten the seams and remove any possible little puckers so you get a nice, flat, well shaped triangle.


How to Make the Bias Tape for the Garland?
Now it is time to make the bias tape, or when you buy some ready-made, you can skip this part 😃

Take your fabric and cut it to the biggest rectangle possible, fold it in half so you’ll get 2 triangles, then cut them with your scissors, and fold them to cut the strips with your rotary cutter and ruler.
It’s important to cut the fabric on the bias rather then parallel to the fabric. The bias is the diagonal line in the middle, if you cut it like this your tape has more stretch. It will be easier to use around curves, it will stay flat and won’t pucker.
Cut your strips 2 inch wide for 1 inch wide bias tape The first strips will be the longest, the next one shorter and so forth. Stop when the strips become too small.
Ana wrote a great post on quick bias tape cutting. Check out her blogpost and video here.


Now we’re going to sew all these strips together and pull them through the bias tape maker to turn them into homemade bias tape.
To sew the strips together, you have to put them in a 90 degree angle, right sides together and let each strip overhang about a quarter of an inch. That’s because were going to sew with a quarter of an inch seam allowance.
Sew right down on the red line


Cut that little overhang of fabric right off and press the seams openAnd now we got a nice long strip of fabric 2 inch wide fabric.
Just continue like this with the rest of your strips until you have the length you need.


Take your bias tape maker, I used the biggest one in my setA 1-inch wide bias tape maker actually makes 1/2 inch wide double-fold bias tape. Take the bias maker, put the strip in it, pull through and iron over it, easy! The result is a single fold 1 inch wide bias
When you come to a seam, don’t worry, just pull and iron.
If you want double fold, fold the bias tape in half and press with your hot iron.


Attach the Flags to the Bias Tape
Then start pinning your flags to the inside of the bias tape. Trim all corners and threads to clean it up before you finish off. Open the bias tape, put the short end of the flag inside and attach them with a clip or a pin.
This is the fun part where you can think about the color matching and the patterns!


Sew the entire open edge from end to end, closing the bias tape. Check regularly if you have both front and back while sewing.

This is how you make a flag garland that will be with you for years. It is such a nice thing to have and decorate the house with when you are having a little party. It also makes a great gift and it is a terrific scrap buster. I hope you had as much fun as I had with this project and you'll enjoy your diy garland!
If you have any questions, don’t hesitate to leave a comment or mail me at an@madamsew.com. I also love to receive pictures of your projects to see what all of you are making!
Any tips and tricks for me and the other sewists reading this blog? Share your experience and leave a comment below.
Happy Sewing!
An
Blogging for MadamSew.com


