Everything you need to know about Madam Sew's Adjustable Zipper Foot
With the Adjustable Zipper Foot you will be able to sew close to the zipper and on either side of the foot. It screws onto the majority of low shank machines and has four parts:
1. Slider
2. Screw for slider
3. Foot Clamp
4. Needle Indents
VIDEO TUTORIAL
ATTACHING THE ADJUSTABLE ZIPPER FOOT TO YOUR MACHINE
1. Switch off your sewing machine.
2. Remove the standard presser foot and your machine’s presser foot holder.
3. Slide the Adjustable Presser Foot into position from behind and put the “foot clamp” (3) around the presser foot shank on the left. The large part of the foot with the indents (4) needs to be facing you and be flat against your machine’s feed dogs. Use the screw of your machine’s presser foot holder to attach the foot. Tighten the screw with a tool/screwdriver.
NOTE: This screw on foot will attach to the majority of low shank machines. If it does not work with your machine, please contact us with your sewing machine brand and model and we will do our best to help you!**
ADJUSTING THE FOOT
You can adjust the zipper foot easily to change the distance between the zipper and needle. This is perfect if your sewing machine has limited or no needle movement. The adjustability allows you to do many home decoration projects such as sewing piping and other trims with a seam allowance tape.
Use the orange screw (2) on the back of the slider (1).
Loosen the screw and position the foot in relation to the needle and zipper coil.
Test manually with your machine’s hand crank that your needle goes into appropriate needle indent (4) which is found at the center of your foot.
Once the foot is aligned, re-tighten the slider screw (2).
WARNING: DO NOT test by pressing the machine’s foot pedal! If you do and the needle is not correctly aligned it could break and potentially harm you or the machine.
HOW TO INSERT A STANDARD CENTERED ZIPPER
1. Use on any style of zipper other than an invisible zipper.
2. Press the seam allowance on both sides of the fabric pieces that you are going to attach to the zipper.
3. Think of your zipper as another piece of fabric and put it right sides together with the fabric piece’s seam allowance. Pin the fold of one fabric piece on the zipper strip close to the zipper teeth.
4. You may want to place pins at right angles on either end of your zipper to mark the endpoint of your sewing.
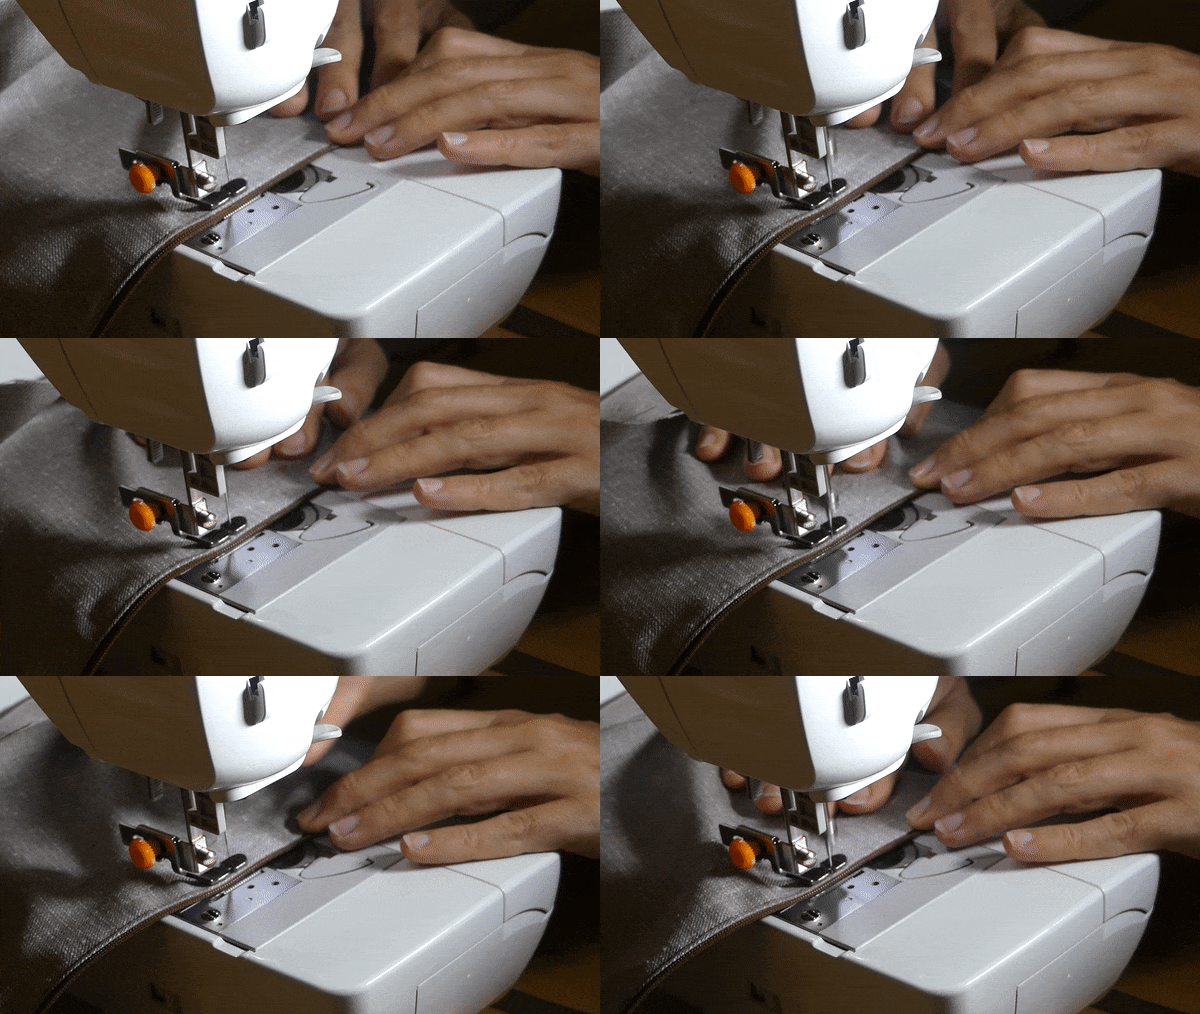
5. Go over to your sewing machine and align the Adjustable Zipper Foot so that the needle indent is on the same side of the zipper piece you are sewing. You are sewing on the right side. Position the foot and needle so that it is snug to the zipper but not so the needle hits the zipper teeth.
**NOTE: If your machine does not allow you to change your needle position or if you do and it is still not lining up as needed, you can adjust this foot to the position you need by following the “Adjusting the Foot” instructions above.**
6. Make sure to test that the needle can drop through the foot’s indent by hand cranking.
WARNING: DO NOT test by pressing the machine’s foot pedal! If you do and the needle is not correctly aligned it could break and potentially harm you or the machine.
7. Once ready to sew, start with a back tack to secure everything in place.
8. Sew with a straight stitch, going slowly at first.
9. When you get to the zipper pull, stop with the needle in the down position and raise your presser foot.
10. Pull the “zipper pull” out of the way and then continue sewing to the end of the zipper or pin marks.
11. Back tack when you reach the end to secure everything in place.
12. To sew the other side of the zipper, reposition your foot following the same steps you did previously but for this side.
You will now have a completed zipper!
With practice, you can sew professionally looking zippers into your clothes or other projects!
The Adjustable Zipper Foot can also be used with other raised edges such as corded seams, tubular cording, slipcover welting and more! Have fun with this foot!
INSPIRATION FROM OUR BLOG
INTERESTED IN THE ADJUSTABLE ZIPPER FOOT?
Adjustable Zipper Foot
The Adjustable Presser Foot allows you to sew closely to raised edges!
With the MadamSew Adjustable Zipper Foot, you will no longer have to worry about sewing into your zipper teeth when adding a zipper. Sew next to corded seams, tubular cording, slipcover welting and more with no problem! And, if your sewing machine won’t let you change needle positions, the Adjustable Zipper Foot will do this job for you!
Retail Price:
Your Price:
You Save:
100% Money Back Guarantee
The Adjustable Presser Foot allows you to sew closely to raised edges!
With the MadamSew Adjustable Zipper Foot, you will no longer have to worry about sewing into your zipper teeth when adding a zipper. Sew next to corded seams, tubular cording, slipcover welting and more with no problem! And, if your sewing machine won’t let you change needle positions, the Adjustable Zipper Foot will do this job for you!


