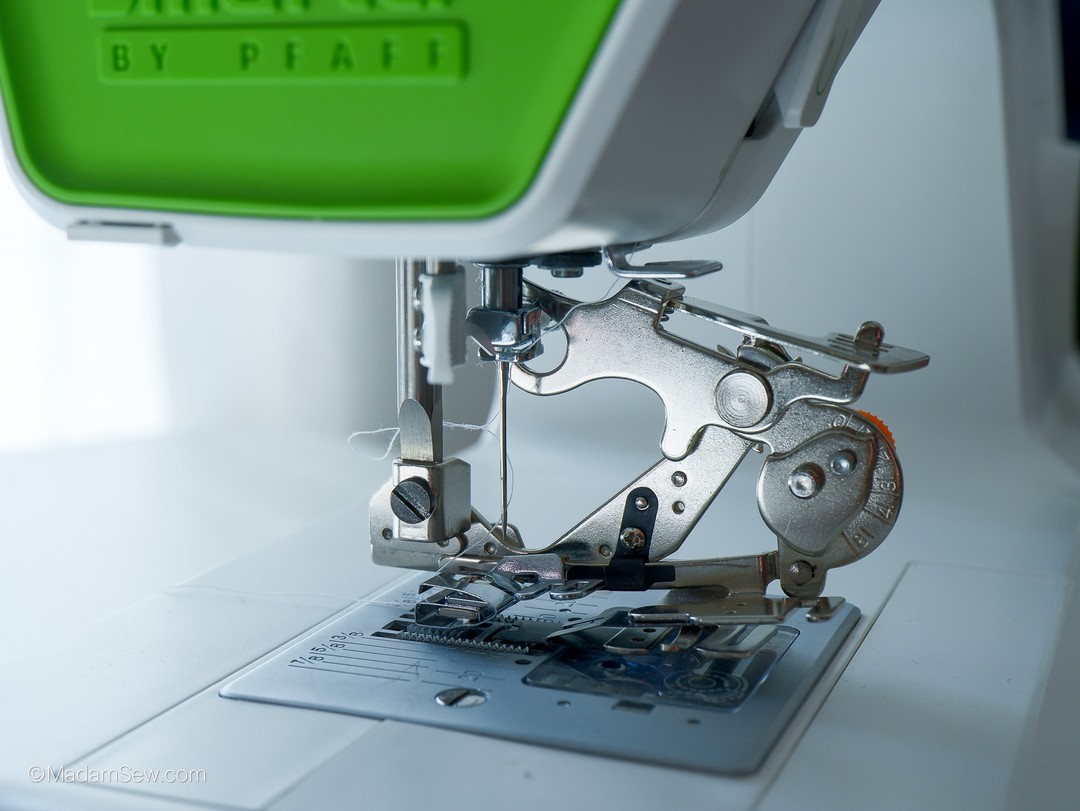
Everything you need to know about Madam Sew's Ruffler Foot
This manual explains all there is to know about this big presser foot called the Ruffler Foot. Once you get beyond how scary and complicated a Ruffler Foot looks, by going through this instruction sheet, you will realize it makes ruffling very easy!
You just need to know:
1. How to attach the foot
2. The different settings
3. How to feed the fabric correctly
So read on and start making ruffles!
VIDEO TUTORIAL
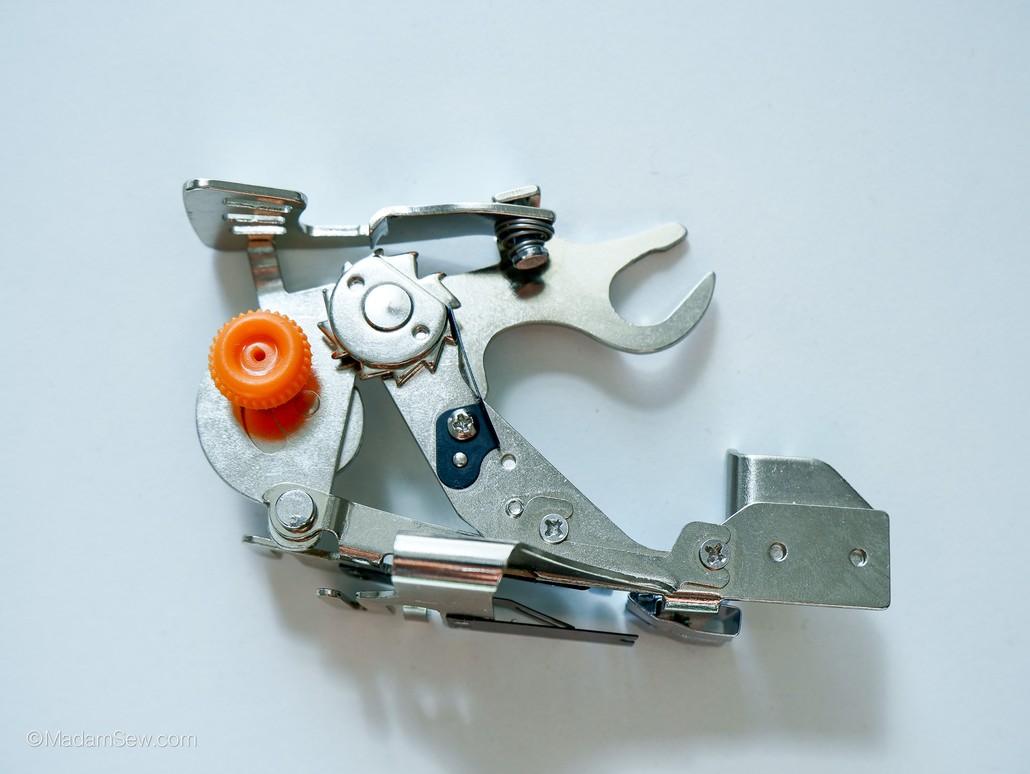
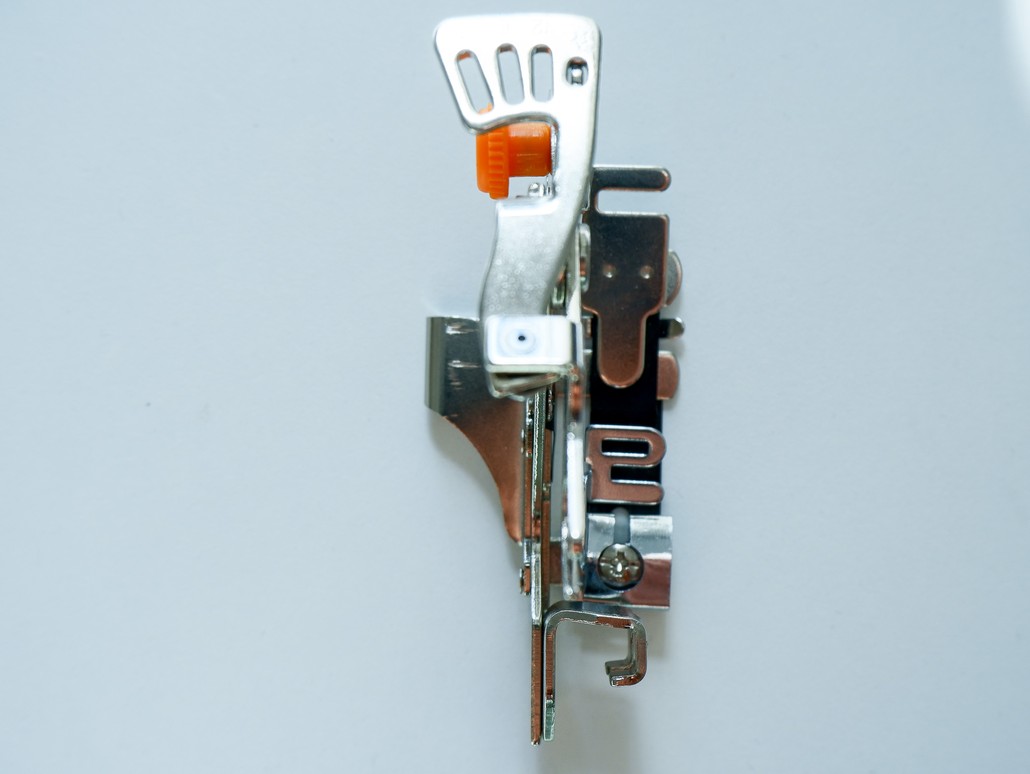
PARTS OF THE RUFFLER FOOT
WHAT CAN YOU DO WITH A RUFFLER FOOT?
You can make both pleated and gathered ruffles evenly, consistently, and fast. The ruffler foot creates pleats or ruffles of all sizes and secures them into place in one pace on a household sewing machine. You can even ruffle a piece of fabric while attaching it to another piece of fabric at the same time. Make lace ruffles, small ruffles, huge ruffles, pleats... use them as a fashion accent on blouses and dresses, as a border for curtains, pillows, bedspreads, and slipcovers. Of course you could do this without a ruffler foot, but it would be a lot harder.
Both the texture of the fabric and the stitch length affect the fullness of the ruffle. As a general rule, use soft fabrics for gathered ruffles and crisp fabric for pleated ruffles.
Fabrics
The ruffler foot works well with quilting cotton. If you are ruffling sheer fabrics, moisten the seam line of the fabric and ruffle while damp. For glazed fabrics you need to position the glazed side of the fabric downward for it to feed smoothly through the ruffler foot.
Unlike the gathering foot, the ruffler foot does work well with heaver fabrics.
Stitch Length
A shorter stitch means more ruffles, or fullness.
HOW TO ATTACH THE RUFFLER FOOT TO YOUR MACHINE
All you need is a little screwdriver. The one that came with your machine will do.
Raise the take-up lever of your sewing machine to its highest point.
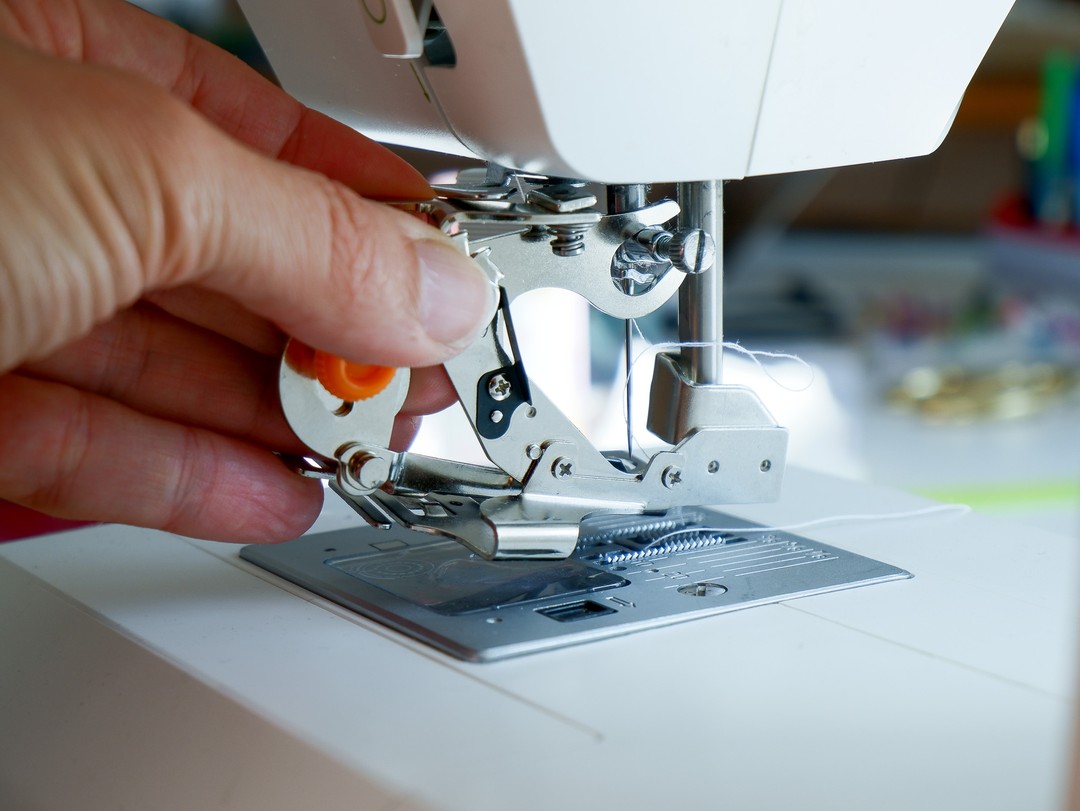
Screw off the foot that is on your machine. If there is a snap-on foot on your machine, you also need to screw off the presser foot holder so you can screw on the ruffler foot. Remove the screw as well. You have to use this screw to attach the ruffler foot.
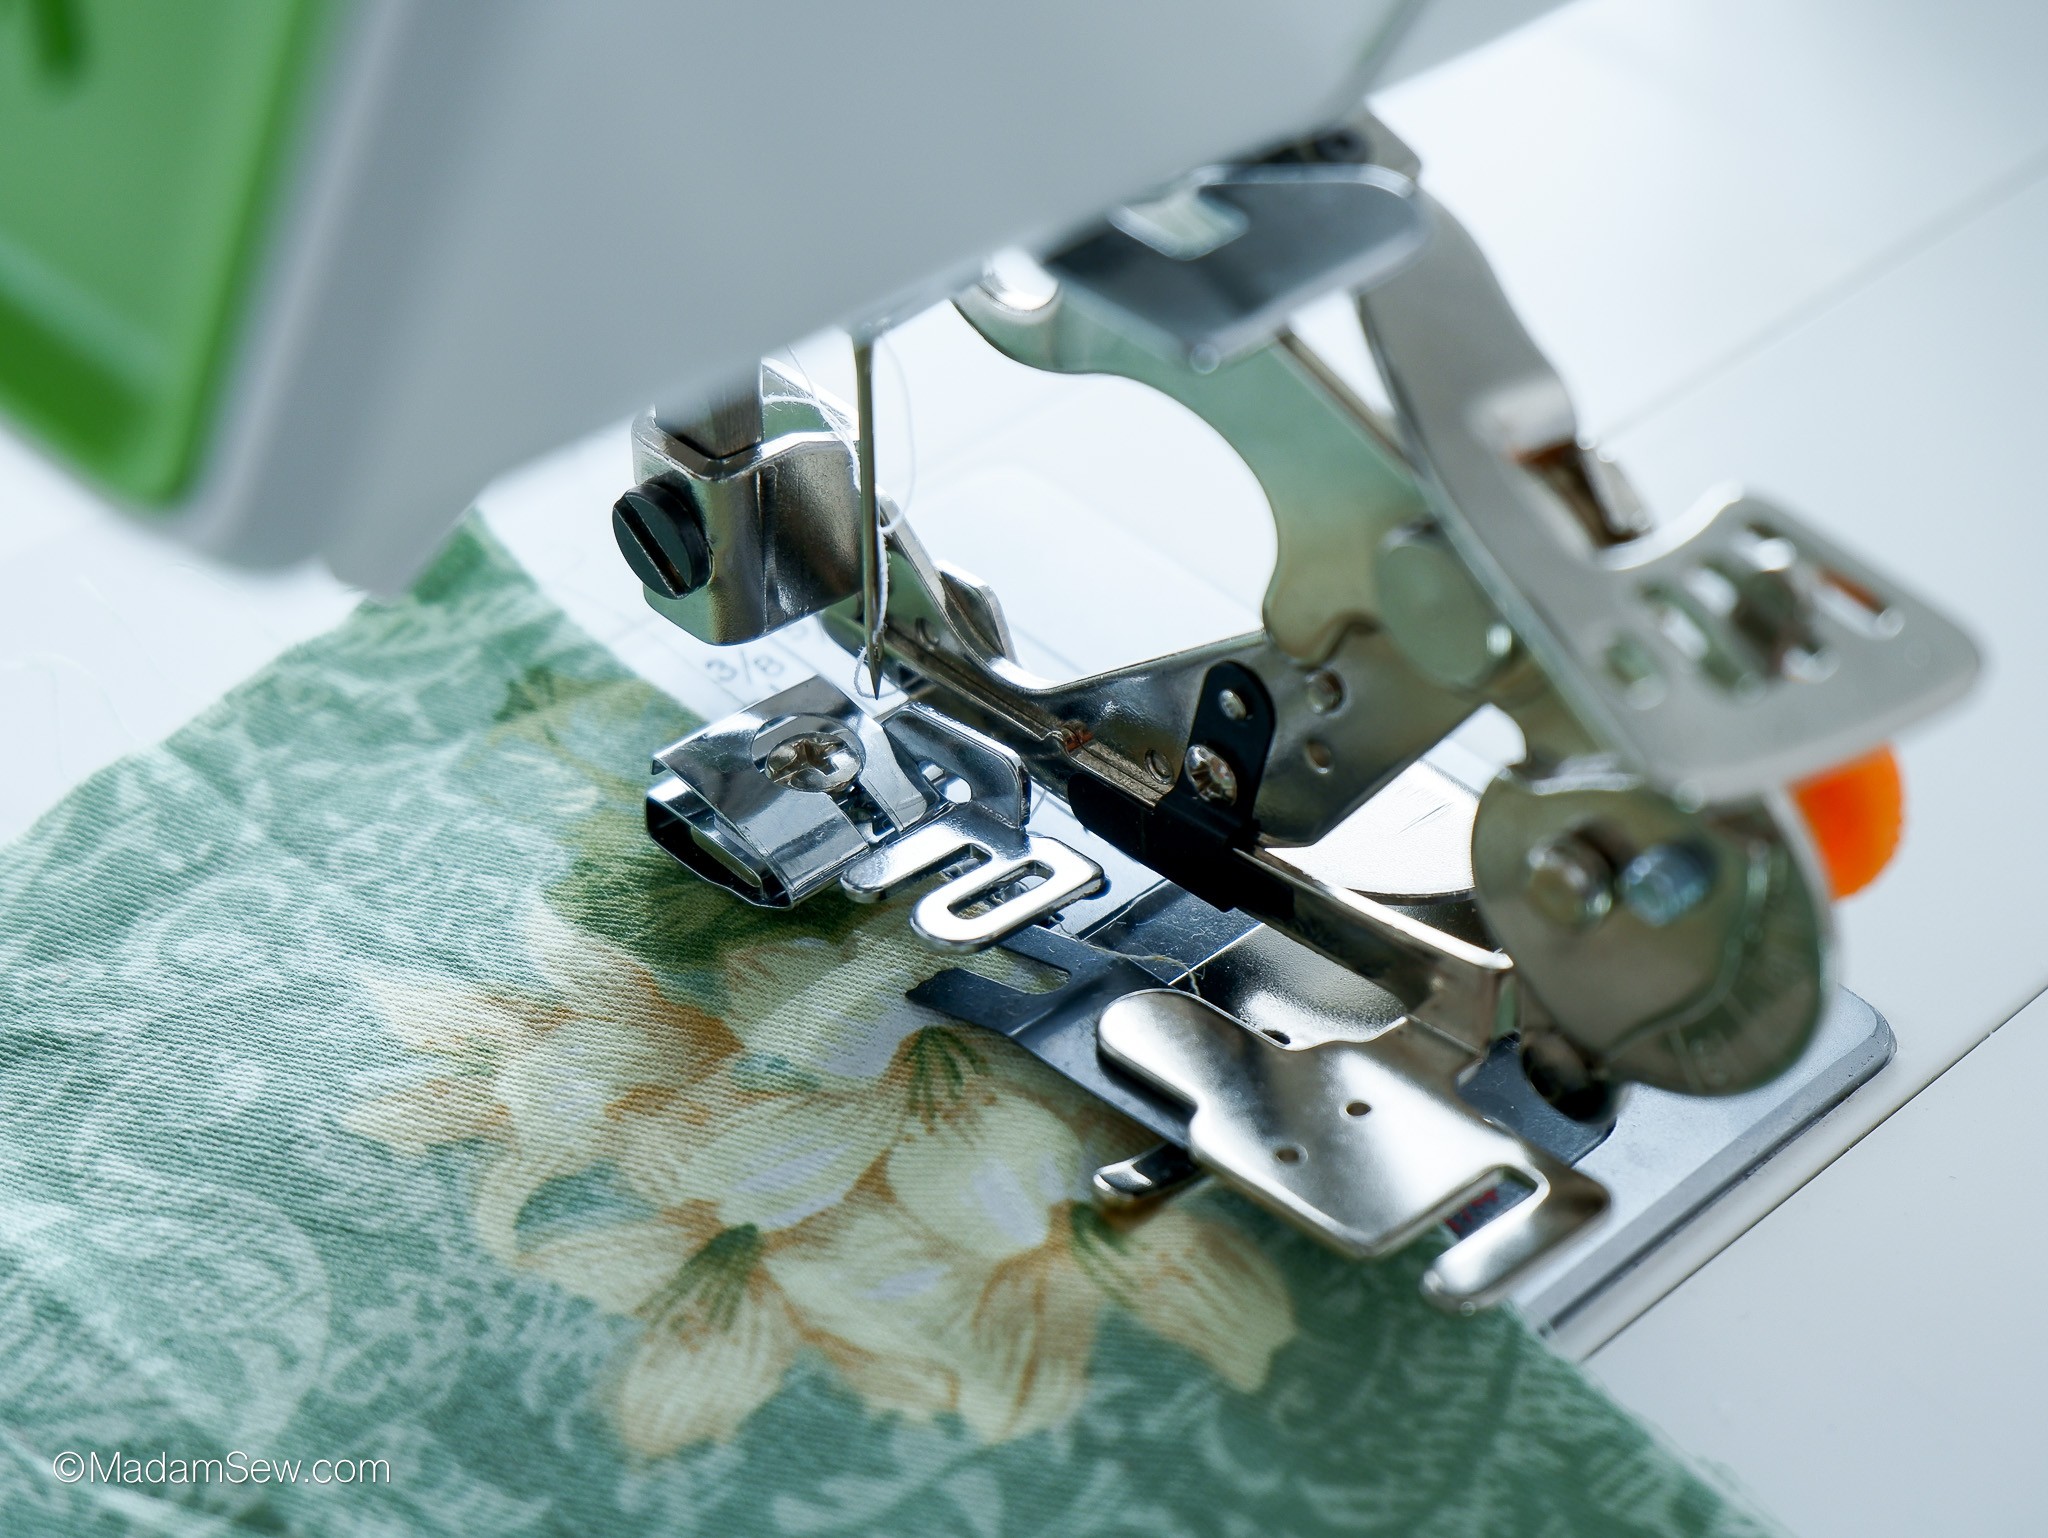
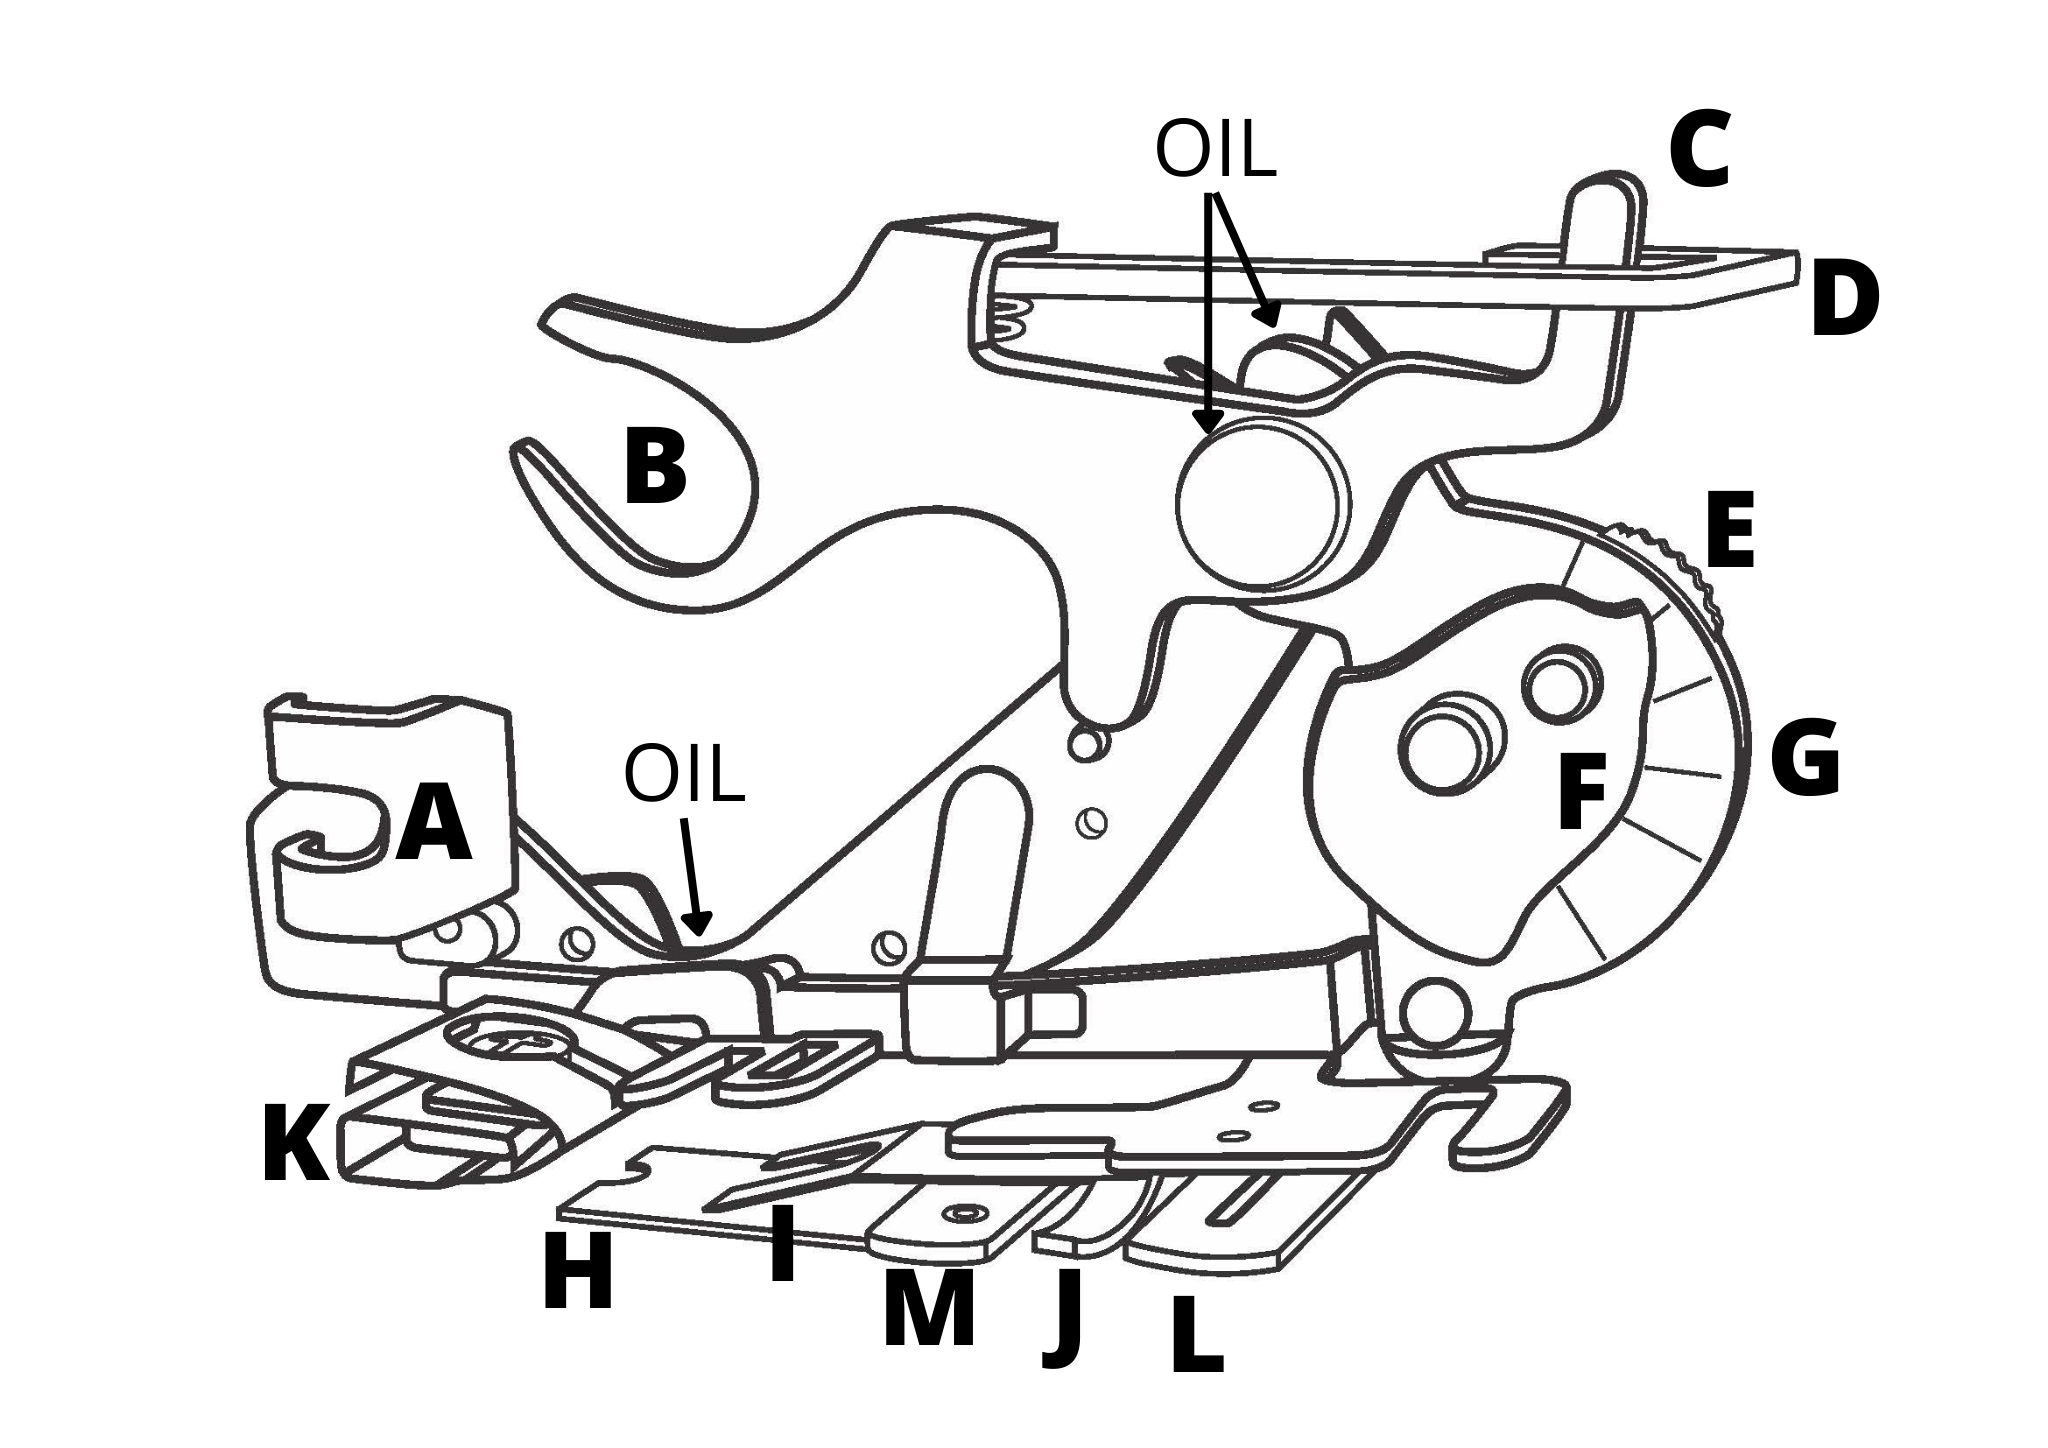
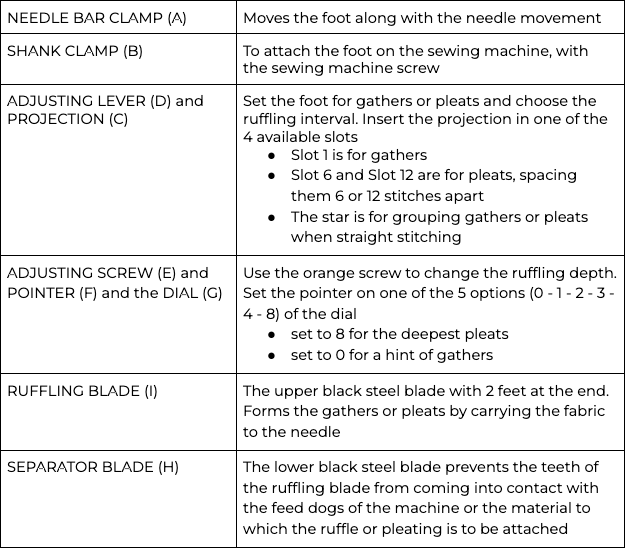
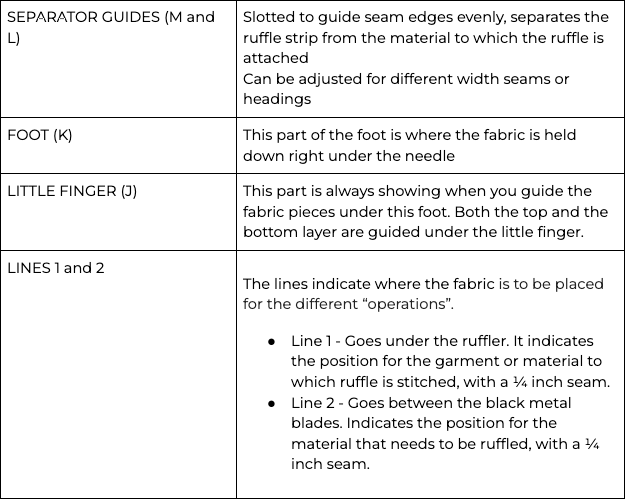
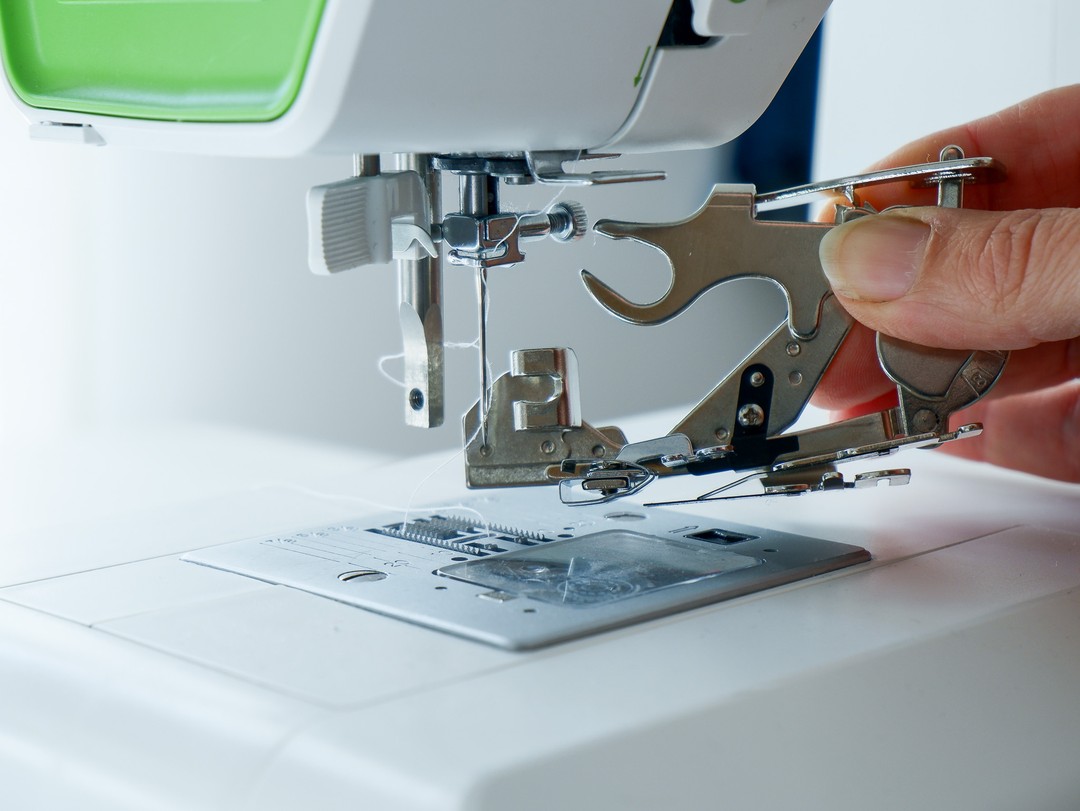
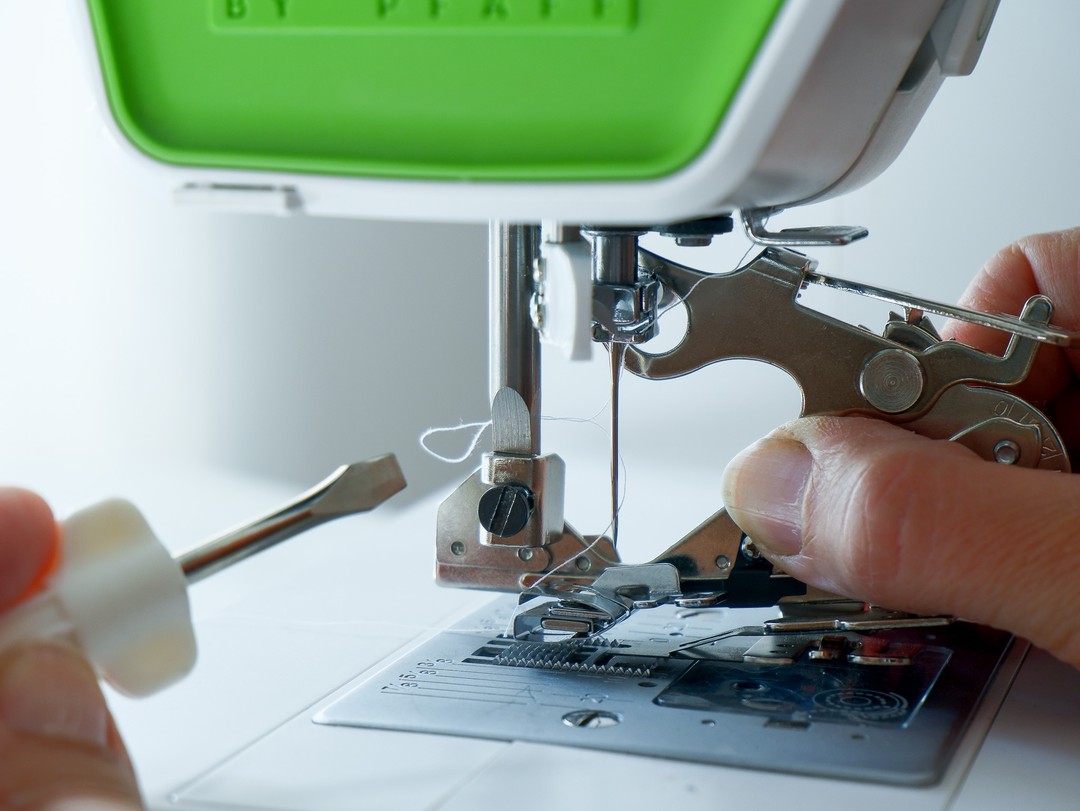
Hold the ruffler foot in the angle as shown in the image and attach it from the right side of the needle, around the needle bar and the shank problems. So, if you’re having difficulty getting it to gather—check your presser foot lever to make sure it’s down! - Grab the needle bar (the large ‘screw’ to the right of your needle) with the clamp (fork arm or the top clasp- B) of the ruffler foot. -Attach the shank clamp (A - the clasp at the back part of the foot) the same way you would attach any other screw-on foot. Screw the foot around the shank with a little screw driver. Make sure that both the presser bar and the needle clamp screws are secure.
Check to make sure your needle clears the needle hole. Set your machine for a straight stitch only. Reduce presser foot pressure as needed.
Lower the needle slightly and draw the thread into the needle hole. Place both needle and bobbin threads diagonally across the feed dogs. And don’t forget to put your presser foot down before you begin! This may sound obvious, but once the ruffler foot is attached, it barely moves when you shift the presser foot up and down. Because of this, it’s very easy to forget and try to sew with the presser foot up, but this will cause problems. So, if you’re having difficulty getting it to gather—check your presser foot lever to make sure it’s down!
Don’t forget to put your presser foot down before you begin! This may sound obvious, but once the ruffler foot is attached, it barely moves when you shift the presser foot up and down. Because of this, it’s very easy to forget and try to sew with the presser foot up, but this will cause problems. So, if you’re having difficulty getting it to gather—check your presser foot lever to make sure it’s down!
WHAT DIFFERENT SETTINGS ARE POSSIBLE?
There are 2 adjustments that can be made on this foot and one on your sewing machine that affects the way the fabric is ruffled.
The adjusting lever (D) with projection (C) on the ruffler foot tells your ruffler foot how many stitches to put in between pleats.
The star means no ruffle. You can do a normal straight stitch without changing it out.
-“1” makes a pleat every time.
-“6” is the one I use the most for a nice ruffle ratio.
-“12” spreads them every 12 stitches if you want just a little gather.
The adjusting screw (E), pointer (F) and dial (G) on the ruffler foot adjusts how deep your pleat is. It tells you how much fabric is pushed as the pleat is made. Playing with this setting gives you even more options. When you tighten the knob or screw you get really small, tight pleats. When you loosen the screw, the pleats are fuller. 8 is the highest setting, 0 the lowest.
Finally, the stitch length setting on your sewing machine also has an impact on the density of the pleats. The shorter the stitch length, the tighter the gathers.
Always do a test ruffle first, to determine what settings to use. You might also want to adjust your machine’s tension settings to find the best combination for your fabric.
HOW MUCH FABRIC DO YOU NEED FOR A RUFFLE?
If you want to know how much ruffled fabric you need for your project, sew a scrap ruffle with the fabric you are using beforehand. Different fabrics will ruffle differently. Unfortunately there is no general rule to apply. It never hurts to have more ruffle that you need, but you sure don’t want to be short of ruffle!
Measure a set length, say 10 inches, plus an inch or two to grip. Once sewn, measure your finished sample ruffle (minus the extra inch(es)) to see how much it’s gathered. Now determine how much fabric you’ll need to get the final effect. For example, if your fabric was 10 inches long, and your finished ruffle is 5 inches, you’ll need twice as much fabric as your finished ruffle.
HOW TO FEED THE FABRIC INTO THE FOOT
IF YOU ARE SEWING RUFFLES OR PLEATS AND NOT ATTACHING IT TO ANOTHER PIECE OF FABRIC
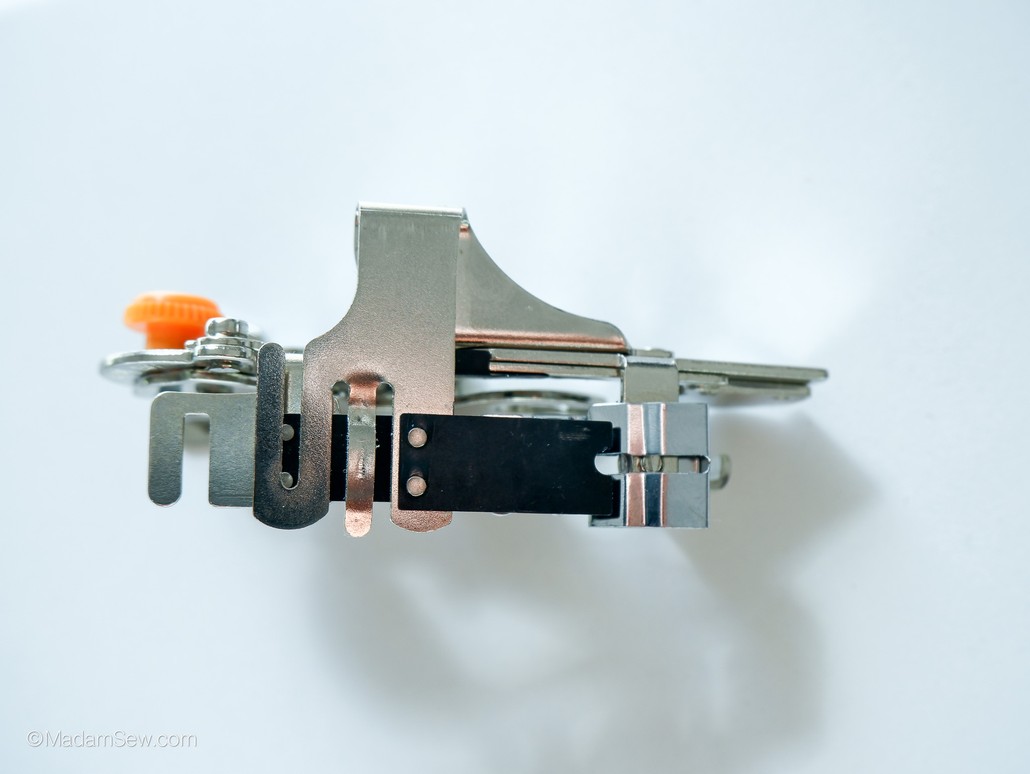
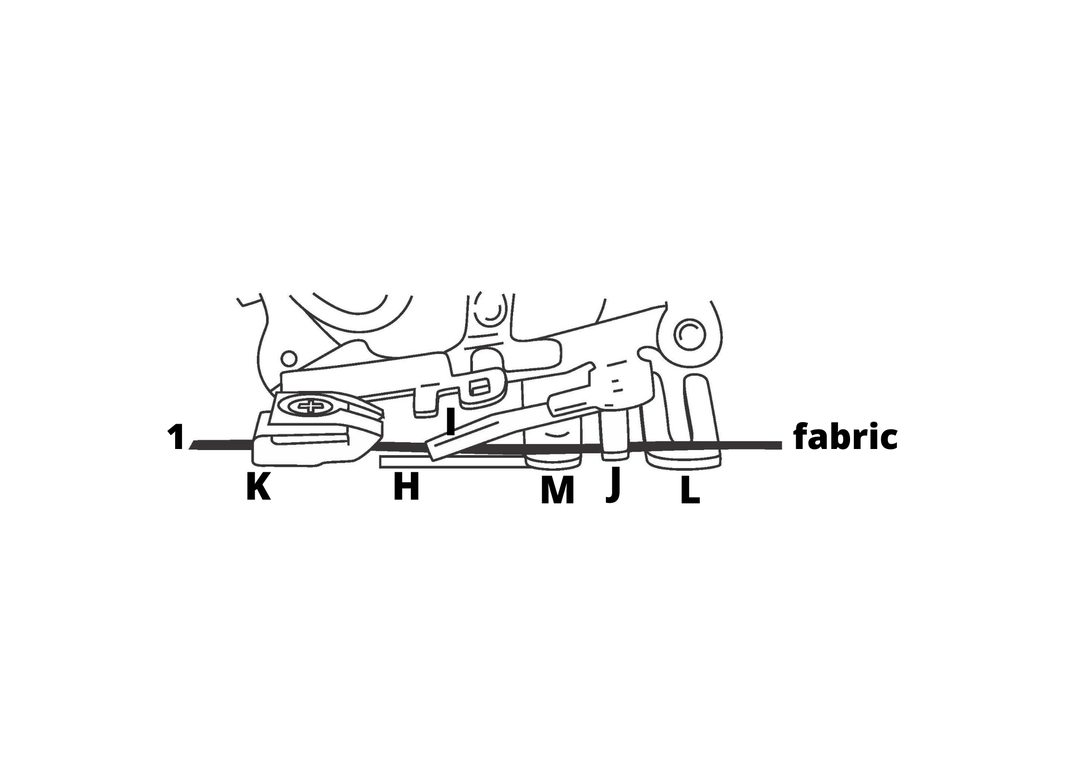
Place the fabric you are gathering between the black blades (I and H) as shown in the diagram above. It sits between the black ruffling and the separator blades and under the first separator guide.
Draw the fabric slightly to the back of the needle.
Route the fabric under the foot (K). Make sure the fabric is under the feed teeth (I) and on top of the separator blade (H) then loop under the little finger (J) and on top of the separator guides (L and M).
Position the needle, lower the presser bar, and slowly begin sewing. As you sew the teeth will push the fabric and make a pleat. The needle will lock the gather.
IF YOU ARE ATTACHING IT TO ANOTHER PIECE OF FABRIC
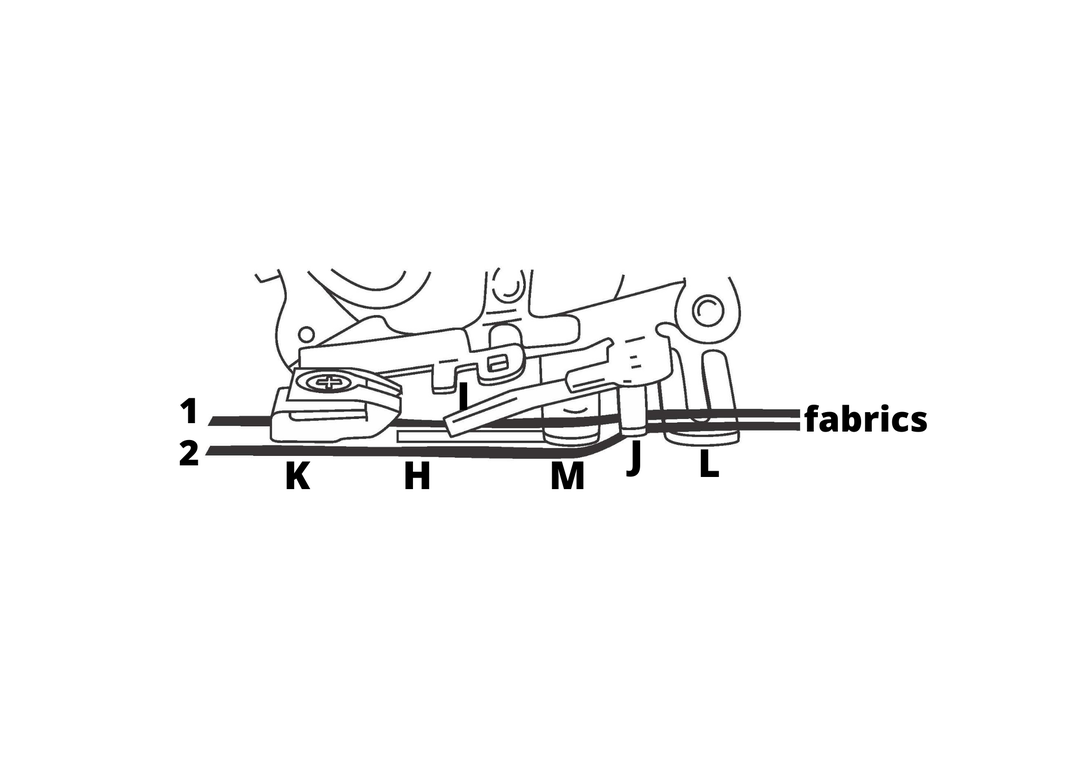
Place the right sides of the fabric together where the seam has to go on the inside.
Position the fabric that will be ruffled (1) under the little finger (J), on top of the first separator guide (L) between the black ruffling (H) and separator blades (I)- like you would when using the foot with one fabric piece.
Place the fabric to which the ruffled fabric will be attached (2) under the black blades (I and H) under the separator blade (M) (between M and feed of the machine) and on top of the first separator guide (L).
EXTRA TIPS
Ruffles are easier to make on the crosswise grain of the fabric. But, whichever grain you sew on, make sure you finish the outer edge of the fabric before you start ruffling.
When you cut your fabric for the ruffle, add at least an inch or two extra at the beginning. It is useful to have an extra bit of fabric to grip while you’re working the fabric between the blades. Just trim it off once the ruffle is complete.
Always practice on scraps first!
MAINTENANCE
The ruffler foot requires an occasional oiling of all moving parts. A single drop of sewing machine oil at each of the 3 points in the illustration (OIL) is sufficient. After oiling, remove excess oil by sewing a few stitches on a scrap fabric.
INTERESTED IN THE RUFFLER FOOT?
Ruffler Presser Foot - Sewing Machine Attachment
The Ruffler Foot is one of the best time saving attachments you can add to your sewing machine. This universal presser foot creates evenly spaced pleats and gathers very fast.
Retail Price:
Your Price:
You Save:
The Ruffler Foot is one of the best time saving attachments you can add to your sewing machine. This universal presser foot creates evenly spaced pleats and gathers very fast.

